How difficult is it to draw dogs, and can you do it in 4 easy steps?
There are over 450 recognised breed of dogs across the globe so there are plenty of them to choose from to fill a sketchbook.
I must admit, although I have sketched our canine friends before, I’ve never spent too long thinking about whether or not there is a logical process to approaching how to draw this animal.
But who doesn’t love a good dog sketch?
As usual, if I was to delve into a step by step approach I would advocate that you sketch a dog in layers! After all, it possesses an anatomy as does a human figure, with muscles included, but with the addition of fur and different facial features.
On a sketch class a few months ago someone asked whether I would approach drawing a dog in the same way in which I explained how to draw a human figure. For the record, I like to use the stick man analogy for drawing a human. So too can this apply to a dog sketch.
Sketching a dog live is a different proposition to working from a photograph. I will touch on this a little later in the post. For the purposes of getting started, however, I’d like to show you how to approach drawing from a photograph and the stages you can work through. This, at the end of the day, will support you get to sketching dogs “live.”
My approach to drawing dogs are adopting the following stages;
- Stick dog skeleton (adopt if a beginner.)
- Muscle
- Faces and adding details to your drawing
- Fur
We have a great model for today’s sketching demo. My good friend Malc, is a beautiful Blue Merle Try Border Collie who belongs to Paul aka the Bald Hiker. You can read more about their adventures here.
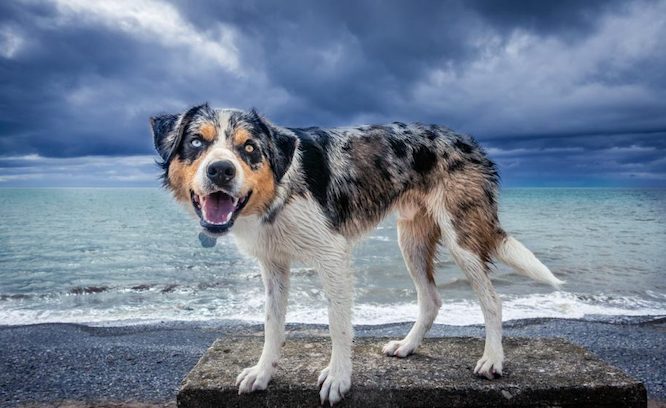
Table of Contents
The 4 Easy Steps.
1. The Stick Dog Skeleton (for the complete beginner!)
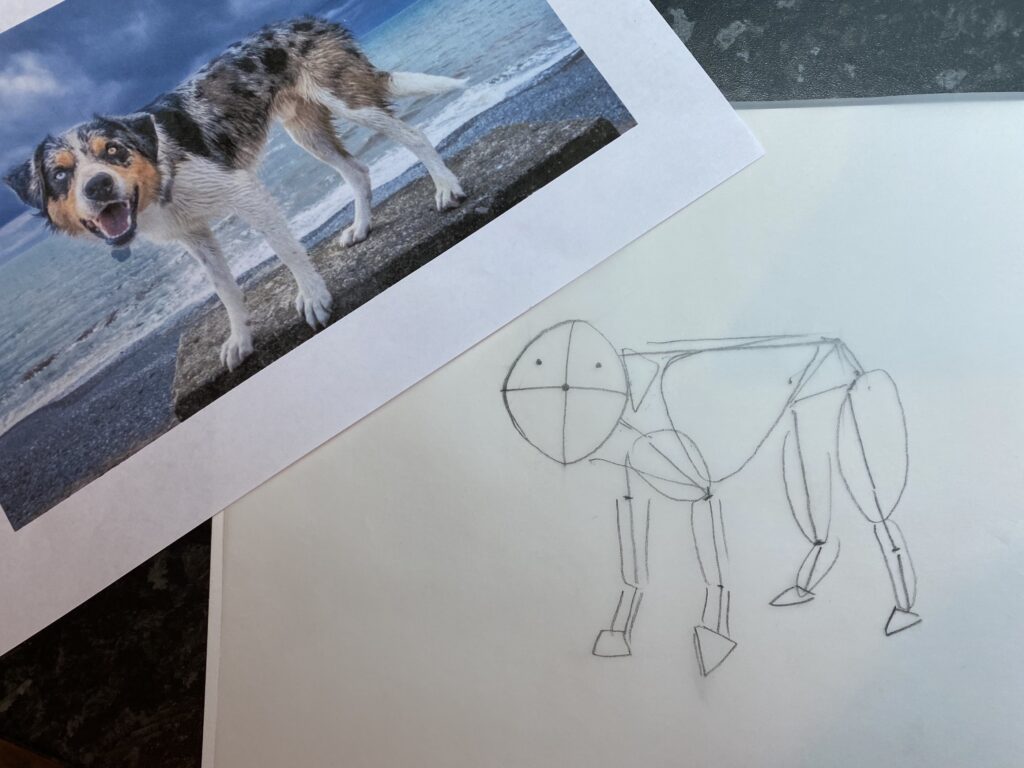
If you are a complete drawing beginner or keen to start using the correct technique, you will need to get a sheet of tracing paper or greaseproof paper for this exercise, as well as an image of the dog you’d like to draw.
I’m a big advocate that with anything you start to draw you capture the entire shape of the image on paper first before starting in on the details. So often when we start to draw we get going with the head at the risk of not understanding how the entire body fits together.
…And, no, you’re not going to trace the entire dog!
This exercise reminds me how important looking at an object is. More importantly, when it comes to dogs and humans, understanding how the anatomy of your subject is put together will fast track your ability to draw. Although we are not armed with x-ray vision we can put together basic skeletal frameworks on paper through which we can build our picture.
Salvador Dali amusingly was known to have said that “if you refuse to study anatomy, the arts of drawing and perspective, the mathematics of aesthetics, and the science of colour, let me tell you that this is more a sign of laziness than of genius…”
In part, I agree with him, although there is no argument to say you shouldn’t just get on and draw and develop your independent style with or without anatomy knowledge. You’re not lazy per se! My opinion, however, is that by learning the basics through the art of really looking at your object and taking a little more time to understand will refine your drawing practise and shortcut time and frustration later on.
Take your tracing paper and lay it over your image. Imagine you are only allowed to use lines on your paper. Draw a stick man / dog over Malc. For the head create a “cross” with two lines to give you a sense of width and height. Try and ignore the fur and imagine your dog has been for a trim. For the paws add triangles and for the head you can add an oval at this stage if you like.
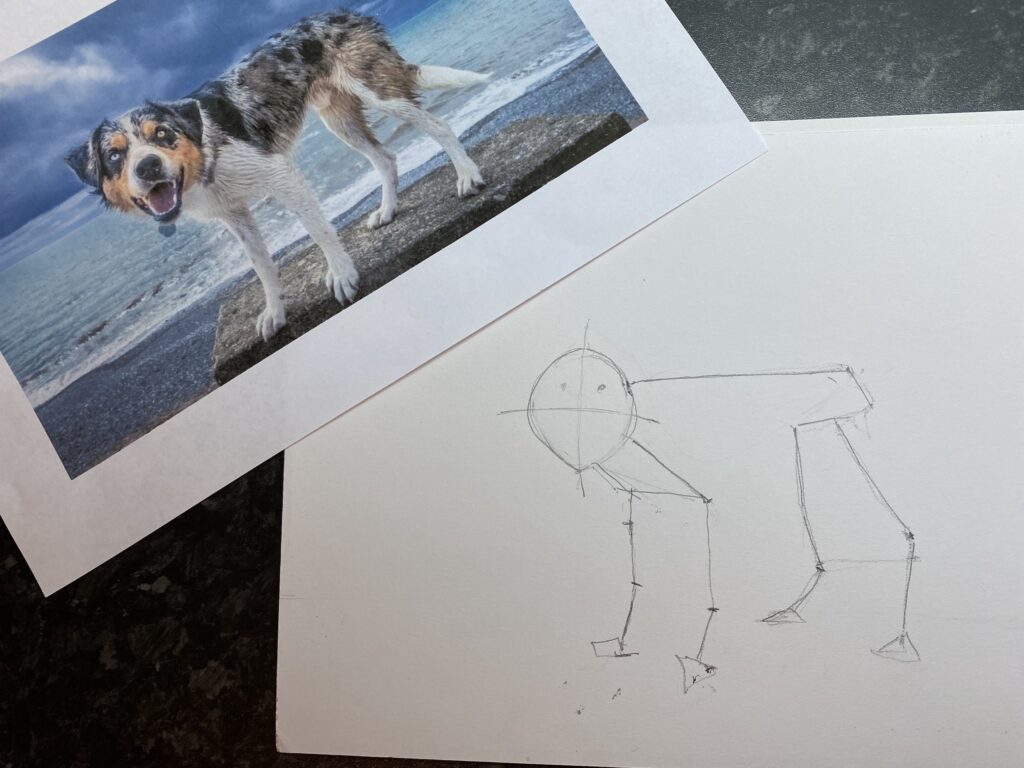
Your image will look something like this. (Not so pretty but bear with me!)
Lift your tracing paper off and look at the stick shapes. Now whilst looking at your tracing paper transcribe your skeleton shape to your clear piece of paper. (Keep your pencil markings light as you will want to return to the drawing and rub these stick lines out.) Keep the picture close at hand so that you are correlating the lines of the skeleton to the image. The more you get to know your image as you build the layers of your dog, the quicker you will be able to sketch dogs in future.
The stick dog drawing approach also helps to get rid of the challenges you may have when it comes to foreshortening. One of my top tips for students when they get stuck with perspective and foreshortening is to go back to the stick method and gauge through tracing paper what the lines are doing!
Don’t worry that your stick animal may look a little odd. It’s meant to.
Would you have ever thought that the image on your paper would be where you started to learn how to draw dogs?
2. Muscle
This is usually the stage at which I begin as a more intermediate sketch artist.
Return to your tracing paper and either a) trace round shapes around the stick dog or b) start a new tracing sketch and focus on capturing the round shapes of the muscles. These should be very basic and oval based. Allow yourself to only use ovals, triangles and slim rectangles.
When you return to your paper keep your stroke minimal when transcribing the shape of the animal’s muscles on the paper. You can now do so around the skeleton frame. Remember, this is still the first stages of getting an accurate sketch on the paper. These muscles will eventually be covered in fur as your drawing develops so don’t worry too much about detail. Your drawing should be gestural! By gestural, convey the sense of movement through the shapes you see.
If you are tempted to trace everything, don’t. What I am trying to convey through this exercise is a simple way to build a foundation to your dog sketch. Believe it or not, you will naturally be able to get this process onto paper extremely quickly the more you practise, to the point that you will just be able to subconsciously do it.
You can now add the oval for the face (based on the “cross” mentioned above) ears and basic face shapes into your dog sketch too.
3. Faces and Adding Details to Your Dog Drawing.
How do you sketch a dog face? Is it your secret ambition to produce a lifelike dog portrait? Sketching dog faces follows the same premise as that of humans. The anatomy of a dog face, although different is nevertheless still unique to that dog.
As part of the skeleton and muscle exercise you will have scoped out the basic “cross” shape to convey the width and depth of the dog’s face. You will have then added the oval shape for the outlines of the head.
A dog face requires more details to be added to it. Return to your image and use the tracing paper to guide you. Build smaller shapes within the face. Segment the nose area, the shape above the eyes and the position of the eyes themselves. Gauge constantly. You can check the proportion of your drawing in a mirror or by holding it away from yourself.
Another point to note is that your lines now need to be more shaped as opposed to straight. Still try and keep this minimal and gesture at shape as opposed to too much detail.
You will probably not need the tracing paper to do this. If you are drawing an image of an entire dog the face may not necessarily need to convey that much detail, but you’d be surprised how different dog faces are!
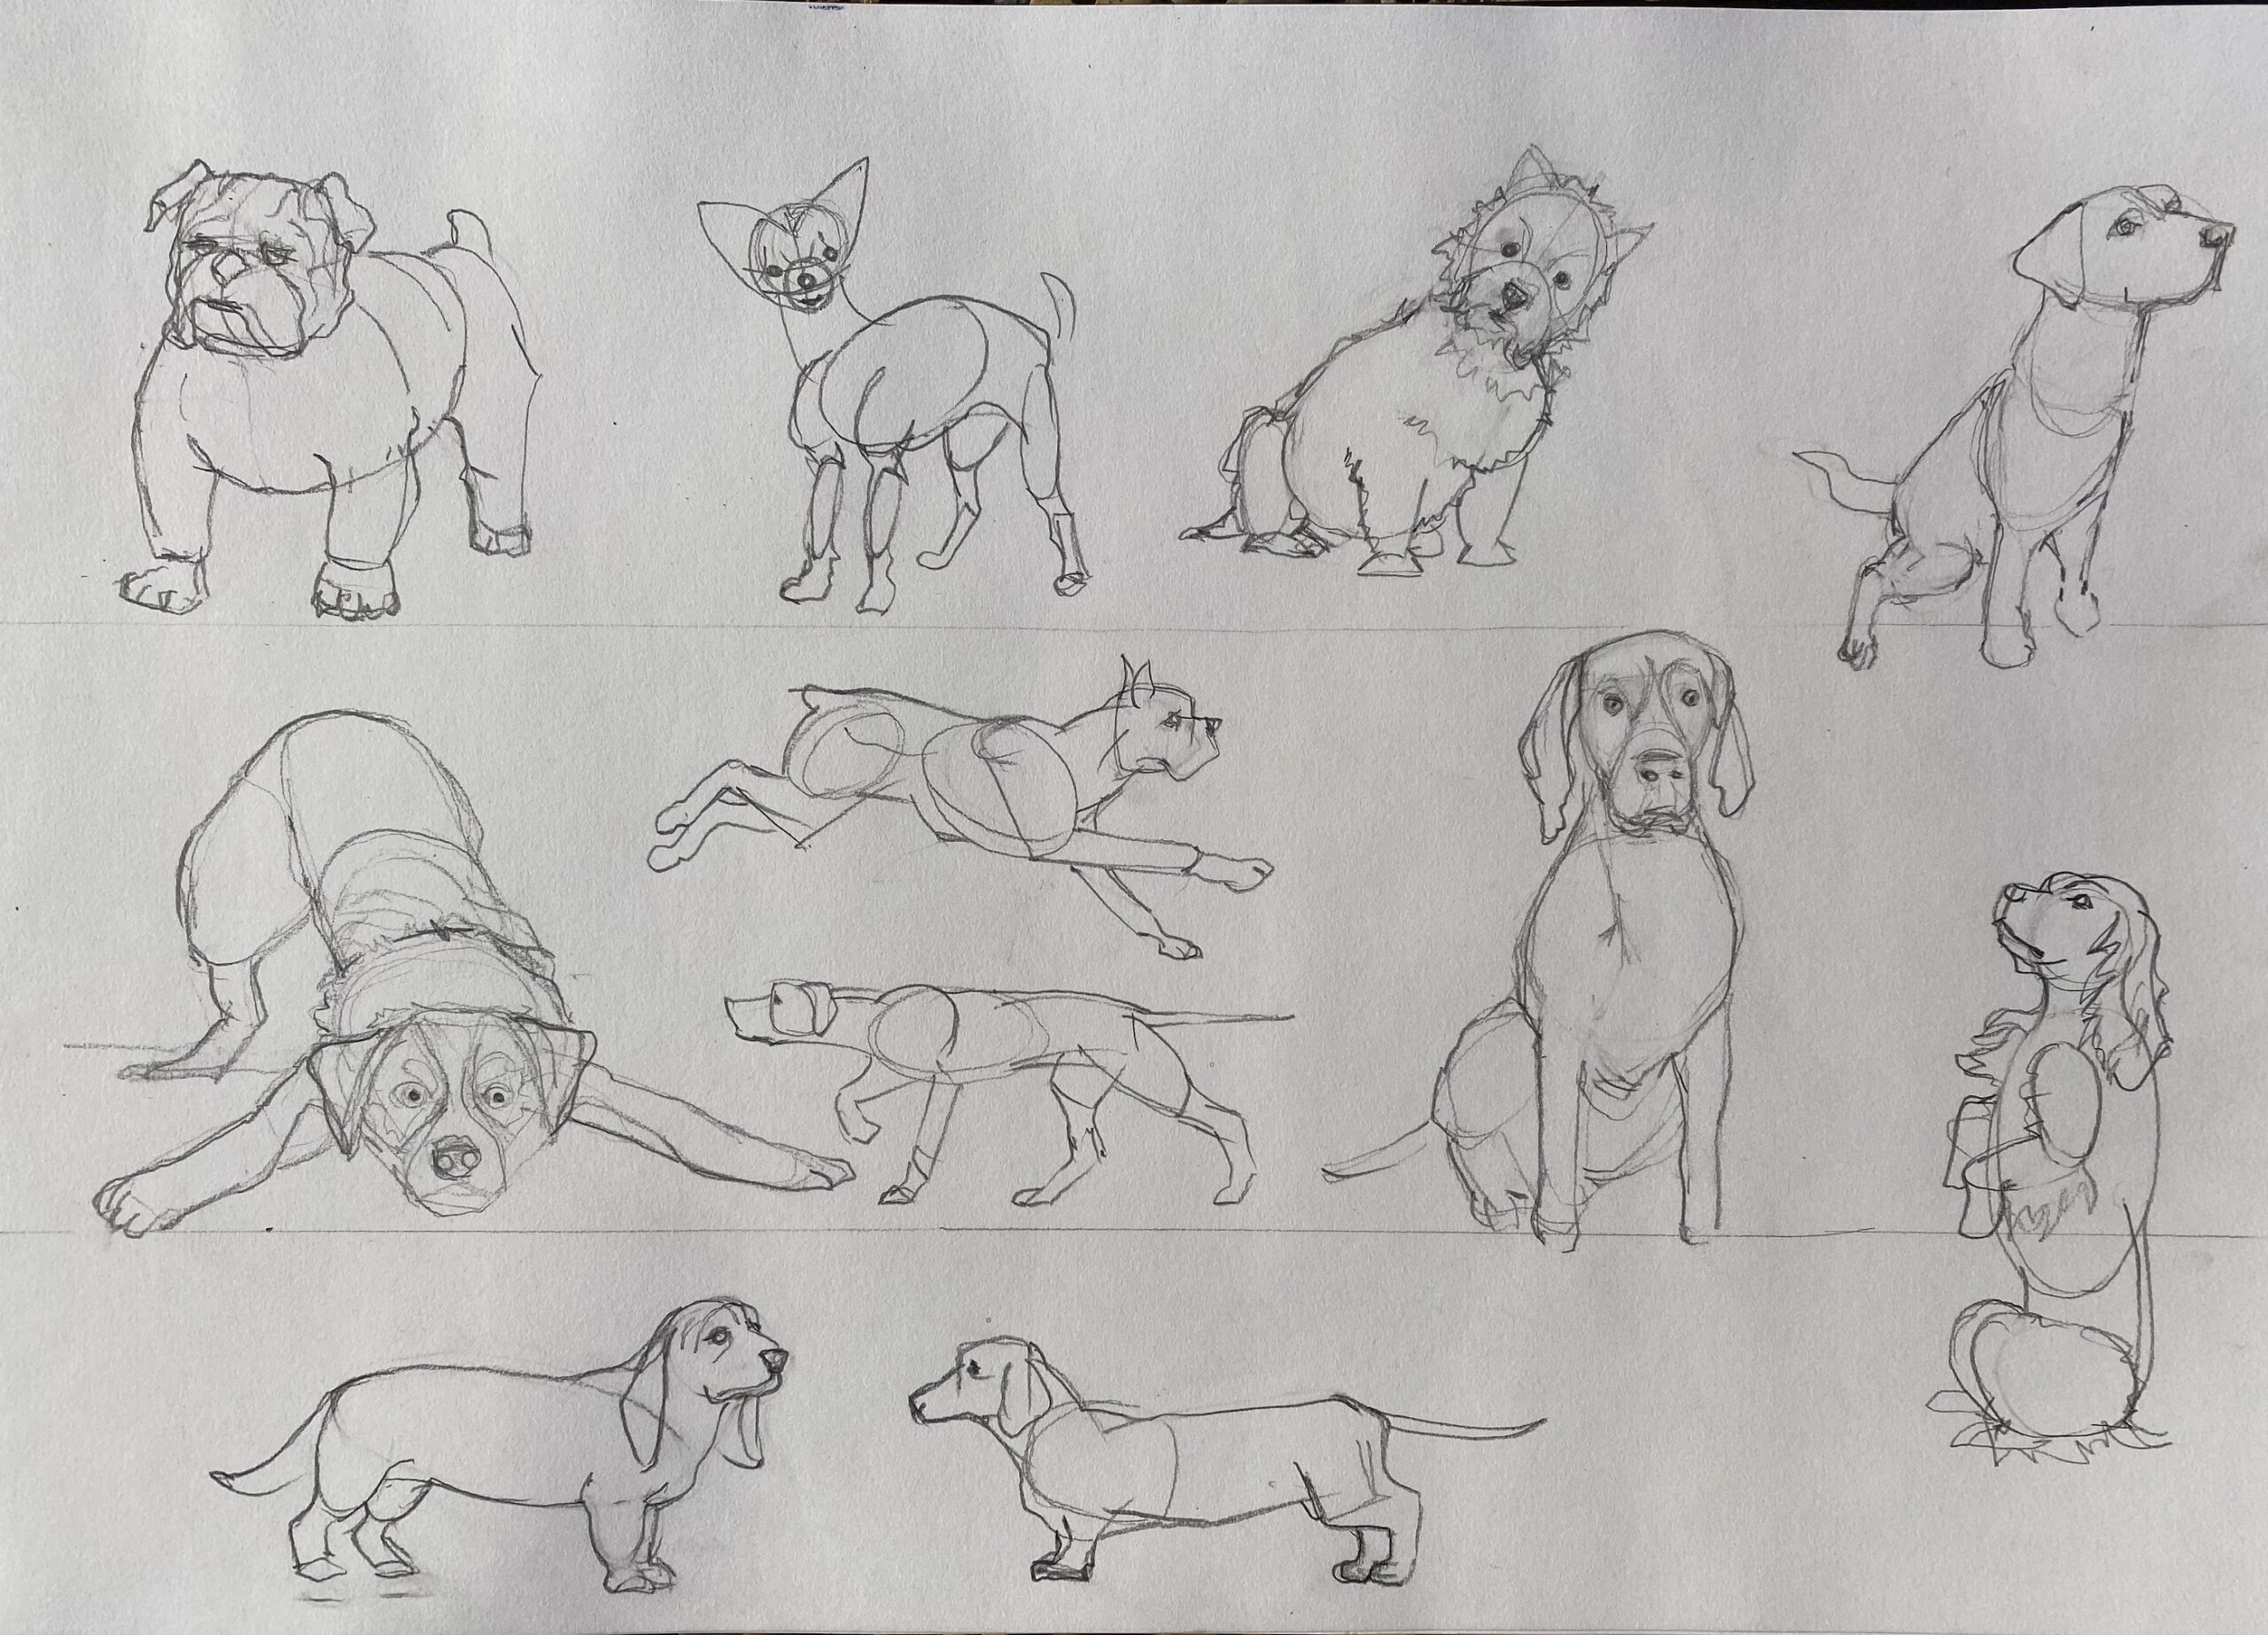
The million dollar question would be, can you tell which breed you have got down on paper by the way in which you have transcribed the shape of the head?
The headline image accompanying this blog post of multitudes of dogs was put together using the techniques I have described so far. Hopefully you can tell the distinctions of the dog breeds by the shape of the heads I have captured.
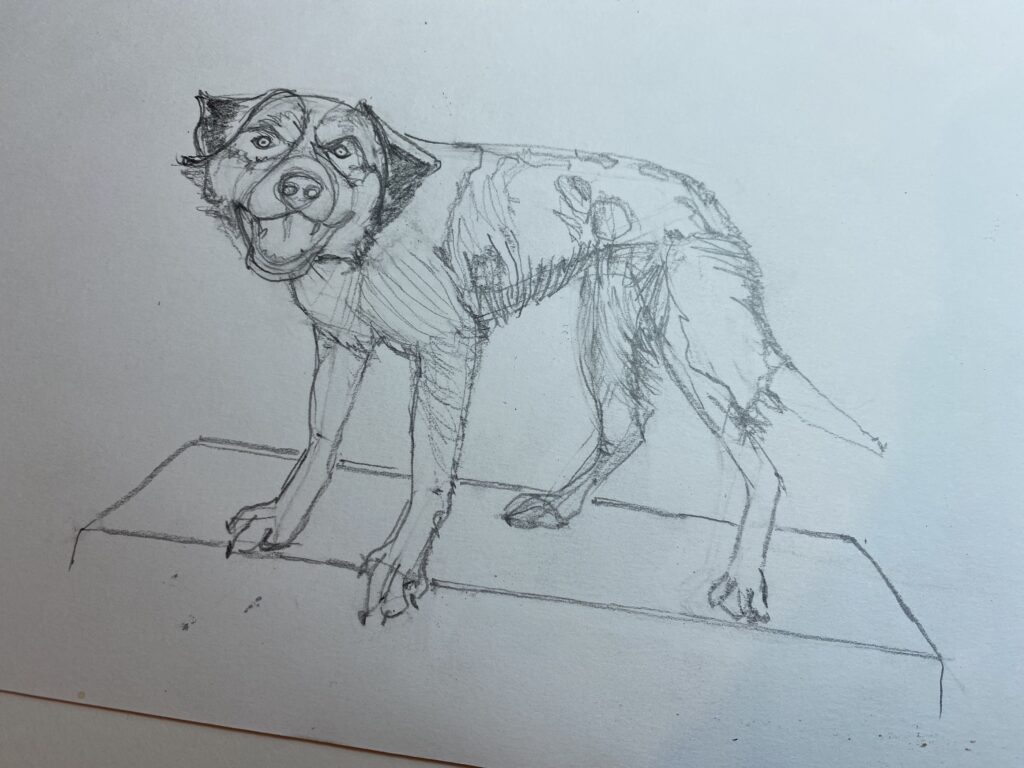
The final stages of your main dog sketch is now blocking in the main details which may include patches of fur, fleshing out the muscles and bones to correspond to the roundness or character of the dog.
4. Fur.
When it comes to adding fur to your dog sketch, everyone will sketch it differently. To me, this is an exercise in mark making. I write extensively about the practice of mark making here. (I love mark making and advocate that everyone should have a small sketchbook to hand to practice making marks.)
The question of fur is all about how detailed you want to make the texture of your drawing. Do you want to zoom in on the direction in which the fur of your dog lies or are you content to simply block out the colour of your animal?
This depends on what type of sketch you are working on. If you are zooming in on the face of a dog, for example, the need to create shading and texture will be more definitive than simply sketching your dog from a distance where tonal colour and the odd jagged edge of hair will suffice. I tend to favour the latter as I only really have time to sketch for shorter periods of time and dedicating time to hairs and fur is a luxury I struggle with.
On a separate piece of paper or page of your sketchbook I would advise you to zoom in on the dog hair you are drawing. Choose the medium you want to use. Are you shading with pencil, are you marking the detail in pen, or are you using loose watercolour to convey the fur?
Take your chosen medium and begin to mark down on paper the direction of the hairs.
You will quickly find that you cannot draw lots of hairs next to one another without creating blocked out colour.
To successfully draw fur, therefore, you need to create a sense of tonality and shading as well as lines or mark making. There are a variety of different stages or layers to this too!
- Start by shading an area you want to work on with a light shade. This outlines the shape of the fur shape you are delineating, for example the tail. Shade in the direction of the fur flow.
- Create a sense of the tail being 3D. Add shade to create shape. Usually the outer edges of the tail can achieve this by adding a darker shade on top of the lighter.
- Shade darker on the edges and add any straggling hairs around the new shape in the direction of the fur flow.
- Make sure you have a sharp pencil or point and create clumps of hair by adding more hairs to the shape. Don’t rush to add lots of hair at the same time, instead draw a few considered strokes around clumps of fur in a “V” shape almost.
- Inside the fur shape add short sharp strokes. These will introduce the clumps of hair. Remember to keep your strokes within the same direction. Also, the shading in between delineates the shadows at play between the fur. The stronger pencil or line you use is in contrast to the baseline shading you started with. This makes your fur stand out from the page and prevents it blending into the shaded areas.
- The fur may be thicker towards the middle and then tighter towards the edges – this adds to the 3D effect you started with earlier. You can also now work on creating deeper tones and colours to illustrate light or shade by blocking in the spaces between the hair clumps with darker colours or pencil shading.
- You can add fine hairs around the outlined space for further fluffiness effect or to highlight further the fur effect.
The longer the hair the more uniform it is as it lies flat against something. The shorter the hair the clumpier it will become on the page. When focusing on shorter hair the above rules apply, with the addition of adding more shadow in between the short hairs.
The secret to drawing fur lies in dedicating time to it.
I hope that this basic introduction to sketching dogs has been helpful for you. You might want to consider watching my live session on the subject as well as jumping on my weekly sketch sessions to build your drawing habit further.
Check out the live session and have a go sketching a dog. Check out my Scratch to Sketch Hub Monthly How to Draw Cats and Dogs Drawing Challenge.
I look forward to seeing you inside the Emily’s Notebook community!