Did you know that “How to Draw Hands” is one of the most popular “how to draw” questions typed into google around the world?
You could hear my abject groan of disappointment that drawing hands seemed such a popular contender jostling for early drawing prominence in the beginners quest to learn. Is it a subject you’re interested in too?
I stopped to think a bit about why this subject should be so popular.
Around the time of writing and putting together my Back to Basics: Learn to Draw in 30 Days course, I delved into how drawing has been taught across the centuries and came across historical tutorials focusing time and time again on how to draw hands. Why should this particular ability feature so heavily as a cornerstone to learning? And…if you are reading this as a newbie to the craft of drawing, should you similarly be paying attention to learning how to draw hands?
I’ve since discovered (or worked out through my own trial and error), that to master drawing hands ushers you beyond the front door and hallowed entrance halls of being able to draw. It’s the process you work through completing this exercise that sets you on a good path to drawing. A process I am going to attempt to explain in this blog post.
And, let’s face it, these overworked and overlooked body parts we come to take for granted, are portable and immediate drawing subjects regardless of where we are or what we are doing. When (successfully) transcribed onto paper there is something iconic about seeing ones hands on the page, perhaps akin to Leonardo’s sketches or Michaelangelo’s hand of God on the walls of the Sistine chapel. (At least that is always what I’ve felt when drawing them!)
So, in Emily’s Notebook fashion, not only am I going to show you how to draw your hands, I’m going to spend some time expanding on the drawing lesson to pay attention to.
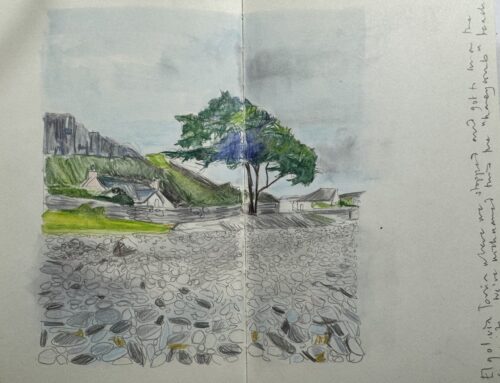
I took a full page of my sketchbook to draw 3 sets of hands. The final sketch I’m sharing with you in this post.
Table of Contents
How to Draw Hands!
Part 1. Getting Started.
When you approach your drawing I’d suggest that you take a read of my previous blog post that challenges your “seeing” process. (You can read about this a few blog posts back in Contours.) Your aim is to get the whole of your image on paper as quickly as possible. We all assume that we should just launch into drawing with a pencil and paper. Actually, there is a pre phase we rarely explore when we draw that I now champion as a pre requisite for all my learners.
Make sure that you outline the wider border of your paper. Decide the space within which you want to draw your hand and either mark this as a frame in pencil on your page, or make a mental note of its boundaries. Take control of the white of your drawing paper.
Your contour line and how you get it down on the page, as quick as you can, supports you anchor your drawing on the page. This helps you avoid creeping towards the edge of your page and either a) finding yourself getting immensely annoyed and frustrated that your drawing (going well so far) has tumbled to its death as it has fallen off the page edge or b) you determinedly attempt to scrunch up parts of your drawing in a bid to make it look as if it fits perfectly! (Guilty of both!)
During this process you keep your eyes, for the majority of time, on the hand you are drawing. (The technical term for this is called modified contour.) Slowly but steadily inch your way over and round and through the soft curves and lines of your hand spending the majority of the time looking steadily at your hand.
I would start my drawing by assessing the starter line. Assess what these are. In my drawing’s case, the tip of the thumb through to the base of the wrist. I then use the clues I am given through looking to uncover what the next line needs to be. An object ALWAYS shows you the lines you need to draw next. It’s like piecing together a puzzle. One line moves to the next. It is in time too that you learn how to gauge what one line looks like in relation to the next. Notice how, with your eye on the hand, you can start to gauge the size by assessing where the lines stop in relation one to the other.
Then quickly use these as a guide to mark up other parts of your drawing. Don’t necessarily worry about perfection at this stage. Go back over the lines if you are not comfortable with them (known as “restating”), accentuate, refine and repeat until you are comfortable with what you have produced. If you’re new to this you should absolutely NOT stress about perfection or procrastinate at what may seem initially complicated. Get used to the act of drawing, pencil to paper. Avoid the rubber too till the very end if you can help it!
(What is very important is to not procrastinate. Those of you that can relate to procrastinatination or have perfectionist tendencies should pause right here and check out my thoughts on this subject that can plague your creativity.)
Part 2. Building the Details.
If you are still struggling with how to draw this hand floating in space in front of you, imagine for a moment that you place a grid, (tracing paper with grid lines on it) over the top of your hand. You could, in fact, as Betty Edward’s suggests in Drawing on the Right Hand Side of the Brain, us a picture plane as you are starting out – a plastic sheet upon which you can mark out your grids. Balance this grid on your hand (awkward I know…you won’t need to do this for long..) and then transcribe what you see. Your job is to “trace” your 3D hand onto a 2D piece of paper. Our job when we draw is to copy what we see as faithfully as we are able. Does it matter the methods we employ to help us get there?
Leon Battista Alberti, a renaissance artist, and one of the earlier polymaths, is perhaps to thank for the earliest picture plane examples. He discovered a way to accurately draw the view in front of him by scribbling what he could see on his glass window pane. Leonardo da Vinci wrote extensively on the subject, and then across the centuries artists such as Albrecht Durer, Van Gogh, and Holbein also developed their own picture planes by which to practise and learn the craft of drawing and proportion true to life. I’m not sure how long they needed these once they had mastered the technique! My challenge to you is to also establish your own methodology or picture plane process. I only needed mine for a short time.
Drawing what you see directly stops you fussing about perspective and this thing called foreshortening. If you start to identify the lines and shapes within your “grid” you just transcribe what you see thereby already capturing and halting any issues you may have with perspective.
Having accurately established the contour process now start to think about the details that can be scoped. Fingers for example and the spaces between them can now start being built into your drawing. Look at what your nails are doing too as well as obvious curved lines such as a bend in the finger. Pay attention to the gaps and spaces which hold equal importance between their negative and positive states.
Part 3. Honouring the Process.
Your “picture plane” whether actual or imaginary, or superimposed by how you “see” your object is a fundamental first step, (as Betty Edwards wonderfully puts it) to “magically smash flat” a 3D image into a 2D one. The picture plane supports you break down step by step how you get this image down on paper.
My added point on this approach is all about your “mind’s eye.” In my previous contour post where I expound upon the drawing process (the bit about how you choose to observe your object) there is an element of abandoning our literal knowledge of the object we are drawing. Forget you are drawing your hands. You are simply transcribing lines onto paper. Take the pressure off yourself!
Our consciousness, knowledge of a thing, view or person, can overwhelm our will to want to draw it because we see it as too complex by what we have come to associate with it. Sometimes we invest too much complexity in the objects we draw by the very way we define them as opposed to what they literally are. A bunch of lines, marks and shapes whether straight or curvy. See beyond the object and make your job instead to draw an accurate rendition of the lines and shapes and marks that you see! Deconstruct what you are looking at and almost, if this doesn’t sound too odd, look past it.
Once you get a grasp of this concept you will suddenly realise that you can draw anything, anywhere applying the same approach.
At this point of the process you have a) established the broader contour lines. b) Started to add the finer details such as the fingers or nails. In this final stage you are drilling down even further into finer detail. You are working on your hands from the outside in, much like the layers of an onion, confident as you tackle each layer that the one that has come before sets you up neatly for the next. It comes as no surprise that hands make the perfect subject for this type of exercise.
When we start the Back to Basics: Learn to Draw course, our opening module is on contours and getting started. Drawing your hand is one of the first exercises students complete using some of the above techniques. Each of the three steps are worked through as we draw them out on the paper.
I love jumping back into this exercise on a regular basis. A spare 5 minutes is all you need as you become more proficient or even if you’re not!
Not only is it encouraging to see the progress my drawing has made, but there is something oddly comforting that at any given moment I can turn to my hands in whichever setting I am in and quickly draw them.
It is a reminder that what I get from them is;
- to look more at my object than paper which refines the accuracy of the image I draw the more I do it!
- to work from the outside…in, from contours through to the finite details.
- to disempower and deconstruct ANY object or view that seems challenging by rendering it under my control as a series of lines, shapes and marks on my page.
But…most of all, the main reason has surely got to be the joy of realising how far and how much I have improved from the very first decrepit pair of hands I drew!
If you can master how to draw hands, you’ve managed, I think to master the approach you need to draw ANYTHING!
Interested in reading and learning more about drawing and sketching? Please do join Emily’s Notebook Community for access to more resources, events and activities. If you’d like to join me too and learn how to learn to draw, implementing so many different lessons and exercises, check out Back to Basics. Learn to Draw in 30 Days!