When you learn how to draw a chair, you adopt a host of drawing skills along the way.
Before I get started exploring what you can learn through the thing you sit on, I want to draw attention to what will make a chair easier to draw.
I have filled an entire sketchbook just with chairs. I surprised myself. I thought that it was not really possible without getting bored of doing so.
Every sketchbook I have researched or flipped through, invariably always ends up containing sketches of chairs. This applies to paintings of the great masters too. They are a reflection of day to day life and, without them, our homes would look, well, a little odd. What I love about drawing them is that they are a reflection of our individuality. As you learn to draw them over the course of this article I advocate finding a chair(s) that you enjoy looking at. The ones in your home will be a great starting point! You might even stretch to filling an entire sketchbook of them.
David Bowie alludes to this,
“Style is about the choices you make to create the aspects of civilization that you wish to uphold. I will buy a chair for my house. What style of chair are you gonna buy? Everything we look at and choose is some way of expressing how we want to be perceived. I mean, why bother choosing a chair because it looks a certain way? Because there’s gonna be something about that chair that says something about you.” David Bowie
Everything we are drawn to or interested in becomes a big part of how we express the “civilization we wish to uphold.” A great added dimension to that can be added to the art we want to create through the mundane objects we choose to celebrate. Just remember, therefore, that the following tips and techniques are suggestions only, or an aid to support you continue finding your creative style. And let me tell you there are hundreds of artists who have preceded you in drawing chairs in expressive and different styles.
I’ll be covering some basic techniques you can easily master with some practise including how to get started with a basic shape, as well as how to work around perspective and foreshortening.
Table of Contents
How to Start to Draw a Chair
Below is a selection of techniques that you can explore and then choose to support you draw a chair. Pretty cool how many different variations there are to support you complete a drawing task such as this one.
Basic techniques
Have you found your “chair that says something about you?”
I built a catalogue of chairs from a range of sources that drew my attention. From the interesting to the downright daily mundane. I flipped through interior design magazines, the chairs in my home, and chairs that I saw “out and about.” Don’t be afraid to take pictures on your phone that you can revisit later or sketch a chair ‘there and then’ or in the comfort of an evening at home. Notice the angle and depth of your chair so that you can capture perspective or simply draw basic shapes. Build a library of chairs that you can use as reference materials to practise the techniques I outline below.
Draw lines
I advocate that chair drawing comes early on in your sketching career. Drawing chairs forms the next step to mark making. For those interested in mark making you can check out an article about it here. One of the exercises linked to mark making is drawing lines. When drawing chairs, confidence with line drawing will help as this is the predominant mark you will need to make. I love how linear chairs are. Have a go just drawing a page full of different lines. Short, long, or dotted, line drawing will endow you with a steady hand and eye.
The main picture accompanying this post was a sketch I completed simply using lines. But, upon closer examination you will see that I have incorporated other lines into the drawing to support me anchor my drawing. Not only is this in the form of the setting, the table on which the chairs stand and the room in which the table sits, but also my invisible lines. Lines which support me understand perspective and foreshortening, a subject I will come onto speak about later in this post.
How to Draw a Chair using Negative Spaces
A few blog posts back, I explore negative space drawing. Negative space drawing is a very useful tool to have up your sleeve to support your drawing technique.
You can read about how I drew a chair using negative space in a blog post earlier. Accompanying this study is the video I put together showing you how this was done. I paint the negative spaces in blue.
When approaching the drawing of a chair try not to see it as just a chair. Forget for a moment that you are drawing a complex shape. Perspective and foreshortening often throw us and damage confidence in drawing what we see. Take into account the positive and negative spaces to help you build a robust drawing. Translate the literal object into the flat of the paper in front of you by transcribing a collection of shapes. Then build your picture.
Perspective
It can be argued that you could get away with not having to use an overt perspective technique to support you draw a chair. You could rely on negative spaces and shapes to transcribe the object in question.
Using perspective is another technique to use when drawing a chair. And I would recommend considering perspective to do so. One point perspective supports you draw geometric objects with realism by using two points on a horizon line. Start with a horizon line with two points at each end. If you take a look at the third picture below you will see that I have included perspective lines in my drawing.
One point perspective in particular means that there is one point on your horizon line where every line eventually meets. This is most definitely a great way to anchor your sketch and ensure you draw in proportion. Don’t get too hung up on this though. Its helpful to know and understand how the technique works but there are plenty of artists that defy perspective to produce unusual looking chairs.
Below I discuss the use of lines when you draw your chair. Take a look at the picture accompanying this article too. It uses perspective to convey the depth of 3 chairs lined up next to each other on a table stretching away from the viewer’s eye. If you carried all the lines on they would eventually all combine to meet in one point.
How to Draw a Chair in 3 Steps
So using a combination of the techniques outlined above here is how you can draw a chair in 3 steps.

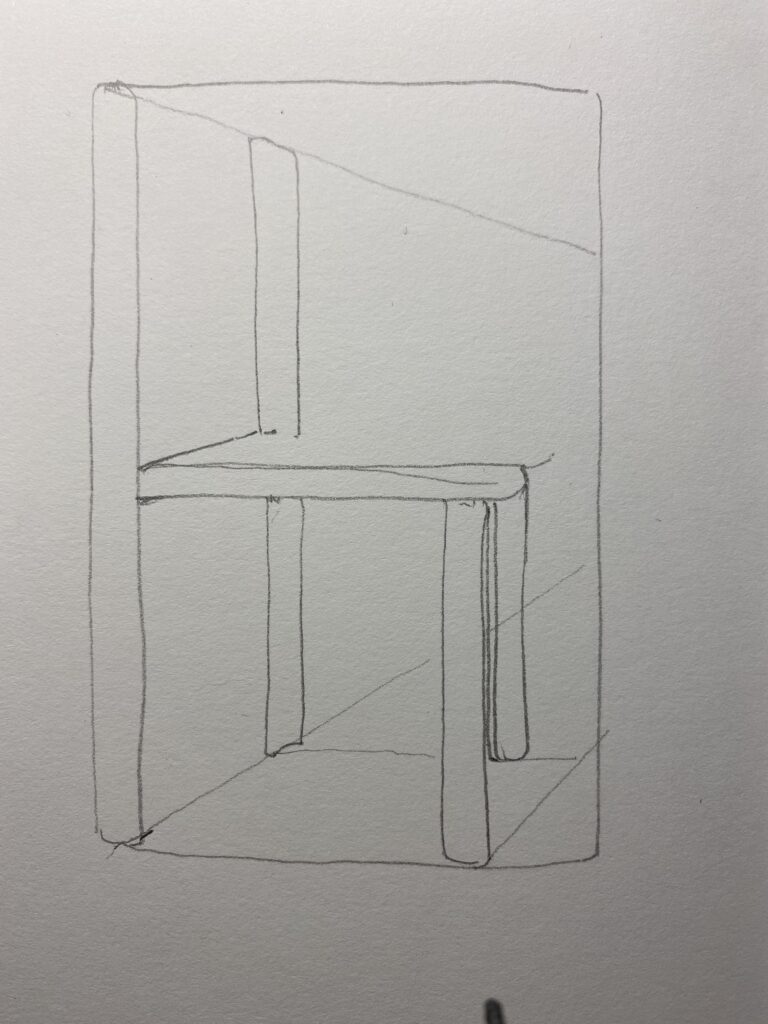
1.One of the initial challenges in drawing a chair is to ensure you capture the full chair on your page. If you are tempted to start drawing one element of it, don’t. Try and capture the entire space of paper that you need for the complete chair by drawing a rectangular box for the whole thing. Your chair will be referenced within this box on your page so you do not run into the danger of it sliding off your page. Put in the basic 2D shape of your chair as you see it. Next, draw the longest side of the chair as your frame of reference, marking points on your drawing for other elements of the chair.
2. Next, take a look at the angle of your chair. Remember the use of negative perspective and imagine the shapes around the legs and arms of your chair. You can use your pencil and gauge the distances of spaces and gaps. Start with the lines closest to you as your starting point. Then build the other major lines into the sketch that give you the outline of your chair. Don’t worry if your original box is absorbed into the drawing. Add your invisible lines, i.e, your one point perspective lines. Keep building different elements of your chair.
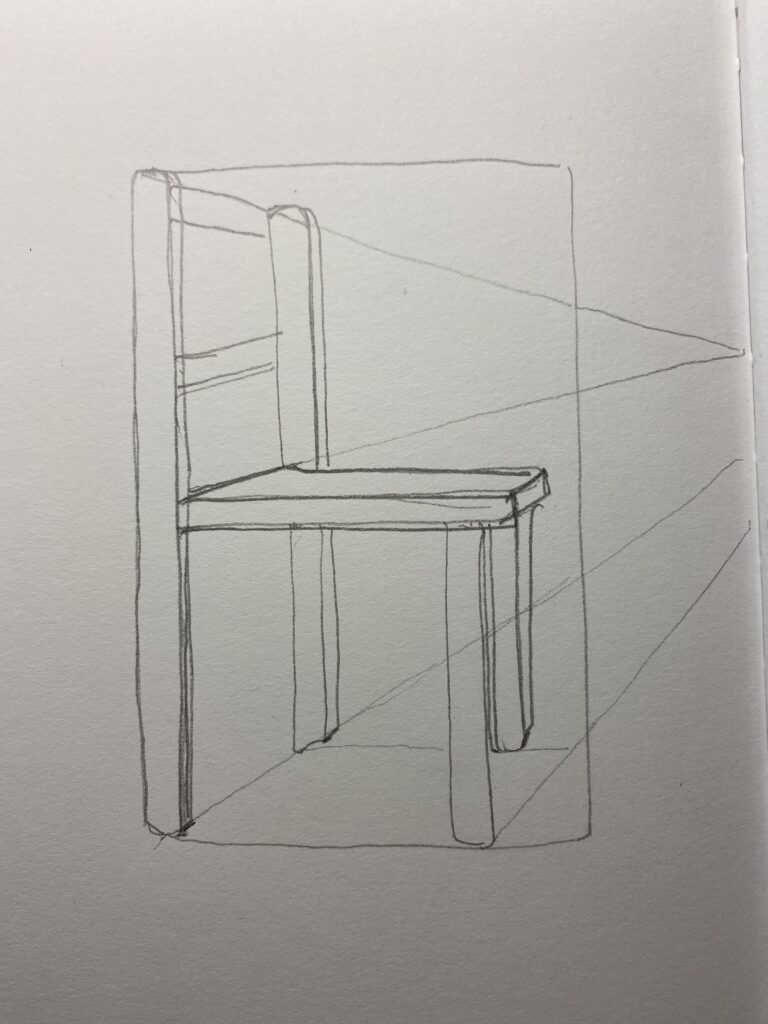
3. Forget that you are drawing a chair and look at the shapes and spaces that you see. Rectangles or wonky boxes? (I can see a wonky oblong box between the legs that help me space out my legs apart from each other.) Try and relay them to paper as they appear to you. On a basic level use this methodology support you build your picture. Notice for, example how the slats of the chair are a parallel line to the chair seat. Use your sense of spacing and gauging i.e one chair leg is shorter than the other the further away it gets from you.
Keep building the drawing in layers with other elements of the chair adding detail as you go. Use your negative space practise to support you too! It is common for the brain to play tricks on you when it comes to perspective. You will think you need to draw a line in a particular way which ends up looking wrong on the page. Using the perspective lines as I have set out here can support guide your line drawing in the correct direction.
What We Can Learn about Chairs in Art?
Chairs hold symbolic meaning in art. A chair symbolises presence and absence simultaneously. It also symbolises a throne, an important seat of authority, in short an emblem of spiritual importance.
You too, if you are reading this will be thinking of the importance of your favourite chair in your home, how it was chosen perhaps and who sits in it the most, be it the cat, yourself or a significant other.
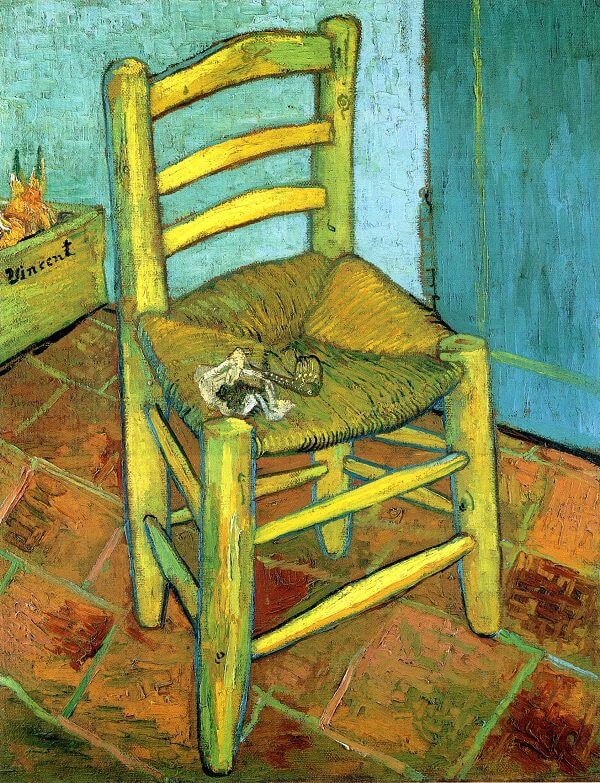
Perhaps the most famous pair of chairs is Van Gogh’s “Chair” painted in 1888 (later finished in 1889) which was paired with Gaugin’s Chair (below) around the same time. They are hot on the heels of his earlier work of Sunflowers. Van Gogh wrote to his brother about the paintings. One can immediately see that this is a Van Gogh painting, not just through the style but also a depiction of the man himself – a self portrait of himself if you will. The painting now hangs in the National Gallery London.
His pipe, handkerchief and signed name being the most obvious clues to its authorship, but also the signature colours, lines and tiles. I love how all of this has been combined in this painting. I don’t know about you but you can get lost in the elements of this painting to the point that you forget you are looking at a chair. Look at how he uses line in this painting and the colour lends a lightness of tone to the painting implying it is painted during the day.
By contrast, he paints a chair in complete contrast to his own that undoubtedly depicts Gaugin. Notice how the chairs sit at opposite angles to the other. One can just imagine the two artists sitting on an evening debating the discoveries of the day across from one another. Gaugin’s chair is painted to connote nighttime, the candle and opulent armchair are reflective of the dark and brooding character of Gaugin. It almost imitates his love of the jewelled colours in his own works.

Notice the difference between the two paintings. Gaugin’s Chair is by far more superior than Van Gogh’s. The brush strokes on this painting are shorter and sharper and there is something in-congruent about the slant of this chair within the painting as it almost spills off the page. A bold chair! Van Gogh was to be let down by his friend who had abandoned a wife and 5 children as well as business career in his relentless pursuit of his creativity. This painting now hangs in the Van Gogh museum in Amsterdam.
Just as the two chairs are painted in contrasts so too were the artists themselves.
The empty chair Van Gogh painted, had come to represent the disintegrating relationship between himself and Gaugin during the period of time that the two painters had spent at the studio in Arles, Van Gogh’s “happy place.” The realisation that hopes of sharing a studio with his idol were never to be realised, must have come as a heavy blow to Van Gogh at the time.
Soon after the artist suffered his first serious mental episode and cut off his ear. It heralded the swift departure of Gaugin back to Paris and so too the realisation of the paintings’ foreboding.
Ironically, the paintings became separated after Van Gog’s death and have ended up hanging in different locations even though they were obviously painted as a complimentary pair.
Who’d have thought a chair could say so much!
I hope you’ve found this blog post useful. If you haven’t done so make sure you sign up to Emily’s Community here. I’ll be sure to send you access to my courses and newsletters.
In addition you can now access a free online course on How to Draw a Chair including an hour long live presentation and resources materials to have a go yourself. Check out the online tutorial here!