Have you ever wondered how to draw birds?
I have. I came to want to find out more about the process of drawing birds after a particular afternoon in lockdown whilst sitting at the kitchen table attempting to educate my little people!
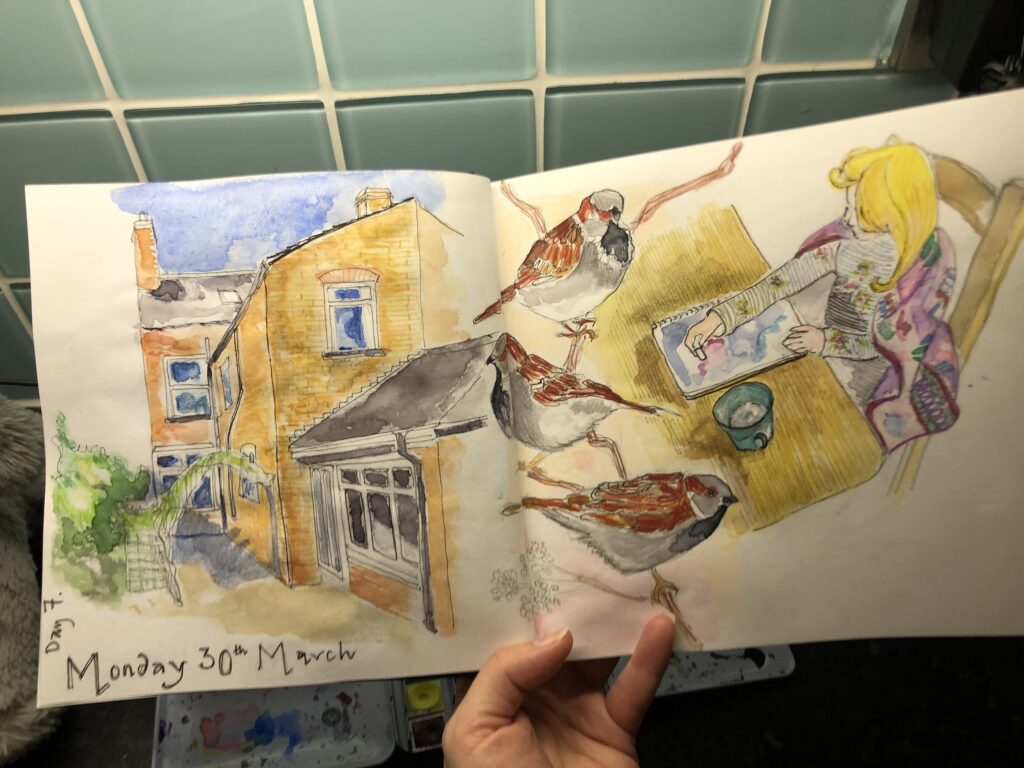
A flock of sparrows were flitting in amongst the leaves of my climbing hydrangea. At the time I didn’t know they were sparrows. (Which just goes to show the extent of my ignorance when it comes to the subject, let alone how to start to draw birds!)
I quickly snapped a picture and entered them into my daily lockdown journal as an accompaniment to my daughter plugging away at her daily homework.
So began my fascination with how to draw birds from my novice position.
Ideally I’d love to be able to quickly draw a bird in whatever location I may be in, but have realised that when it comes to achieving this ambition, there is a step by step process to follow.
First of all we need to discuss semantics.
Table of Contents
How do you work out what bird you are looking at?
In order to be able to draw a bird, you need to spend time looking at them. They are fast creatures so you too need to be fast. You then need to create a process of identification so that you are able to work out how to draw birds as the final outcome to unlocking the avian world. What I have found fascinating about this process from start to finish is the level of focus I put into the skill of observation in order to capture a bird.
Observation is the first underpinning step to drawing birds. So make sure you assign more time to it!
On its own however, observation is not going to cut it especially if you don’t know what you are looking for!
I love the way that the RSPB describes this process in their Birds of Britain Book,
“A familiar bird is like a familiar face in a crowd, an unfamiliar one is just as difficult as trying to find a person you have never seen before in a crowded street….It can often be quite a challenge.”
Equip Yourself with the Essentials.
Before you head out to identify birds, it’s essential to have the right equipment on hand. Here are some essential items for a successful birdwatching experience:
- Binoculars: A good pair of binoculars is your most crucial tool. Look for ones with a comfortable grip, appropriate magnification (8x or 10x), and a wide field of view to make spotting and observing birds easier.
- Field Guide: A field guide is like a bird identification encyclopaedia. Choose one that is specific to your region or the area you plan to explore. Field guides provide detailed illustrations, photographs, and descriptions of different bird species. I have the generic guide by the RSPB covering UK based and European birds.
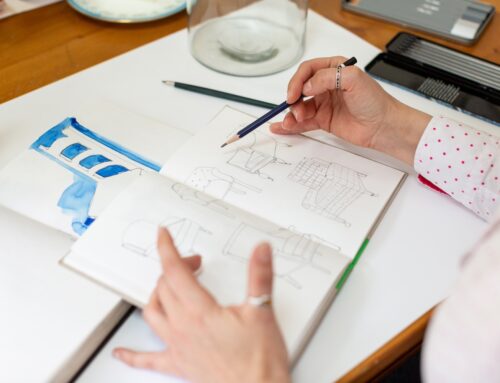
- Notebook and Pen: Keeping a bird journal (or sketchbook in my case), can help you record your observations, note distinctive features of birds, and track your progress over time. For me, the sketchbook is a brilliant tool for this classification process.
- Smartphone or Camera: Capturing images or recordings of birds can be helpful for identification later. Many smartphone apps are available to aid in bird identification using photographs or sound recordings which I reference below.
Observe and Note Key Features
When you come across a bird, take your time to observe its key features focusing on the following aspects:
- Size and Shape: Note the overall size of the bird and its shape. Is it small or large, slender or robust? These characteristics can help narrow down the possibilities.
- Colouration: Pay attention to the bird’s colour patterns on its body, wings, and head. Look for distinctive markings, such as patches, stripes, or spots.
- Bill Shape: The shape and size of a bird’s bill (beak) can provide valuable clues about its feeding habits and habitat.
- Habitat: Where you spot the bird can offer hints about its species. Different birds prefer specific habitats, such as forests, wetlands, grasslands, or urban areas.
- Behaviour: Take note of the bird’s behaviour. Is it perching, hopping, diving, or hovering? Behaviour can offer insights into its feeding habits and lifestyle.
- Call and Song: Birds often communicate through calls and songs. Record the sounds using your smartphone or note their distinct calls in your journal.
Utilise Identification Resources
Modern technology has made bird identification more accessible than ever before. Here are some resources you can use:
- Field Guides: As mentioned earlier, field guides are invaluable resources with illustrations and information about various bird species.
- Mobile Apps: Numerous apps allow you to identify birds using photographs or by recording their calls. Merlin Bird ID, eBird, and iNaturalist are popular choices.
- Websites: Online databases and websites provide images, descriptions, and distribution maps for various bird species. Websites like All About Birds, eBird, and Audubon (which is a personal favourite that follows the fly ways of birds in the US) are excellent references.
- Local Birding Groups: Joining local birding clubs or online communities can connect you with experienced birders who can offer guidance and share their knowledge.
The Art of Deduction
Identifying birds is often a process of deduction. Compare your observations with the information you’ve gathered from resources. Cross-referencing physical characteristics, behaviour, habitat, and sounds can help you narrow down the possibilities to a specific species.
Remember: Patience and Practice!
Remember that bird identification is a skill that takes time to develop. It’s okay to make mistakes; in fact, they’re a natural part of the learning process. The more you practice and the more birds you encounter, the better you’ll become at distinguishing between species and remembering them over time.
How to Draw Birds. The Key Steps.
When drawing a bird’s anatomy, paying attention to proportions, details, and the specific features of the bird species you’re interested in is crucial. Reference materials, such as anatomical guides, images, and videos, can greatly assist in accurately depicting the unique characteristics of each bird.
Step 1: Gather Your Materials
Before you begin, make sure you have all the necessary materials at hand. You’ll need quality drawing paper, pencils (ranging from H to 6B for varied shading), an eraser, and any preferred colouring tools like colouring pencils or watercolours.
Step 2: Observe and Reference
Start by observing real-life birds or studying photographs and illustrations to understand their anatomy, proportions, and unique features. Pay attention to details such as the shape of the beak, the curvature of wings, and the patterns in the feathers.
You may like my month long “Bird a Day” drawing programme!
Step 3: Basic Shapes
Begin with simple shapes to outline the bird’s body. Sketch an oval for the body and a smaller circle for the head. Add a curved line for the neck and a slightly elongated oval for the tail. These basic shapes will serve as the foundation for your bird drawing.
Step 4: Define Anatomy
Using your reference, refine the basic shapes into the bird’s actual anatomical structure. Add a slightly pointed beak, mark the placement of the eyes, and sketch the wings’ primary and secondary feathers. Capture the curves and contours that give the bird its characteristic form.
Step 5: Details and Features
Now it’s time to add more intricate details. Pay attention to the unique features of the bird you’re drawing – whether it’s the intricate patterns on its feathers or the distinct markings around its eyes. Carefully sketch these elements while maintaining the overall proportions.
Step 6: Shading and Texture
Shading is where your drawing truly comes to life. Use various grades of pencils to create gradients and shadows, giving the bird a three-dimensional appearance. Pay attention to the direction of feathers and use lighter strokes for areas that catch more light. This step adds depth and texture to your drawing.
Step 7: Bring in Colour (Optional)
If you’re working with coloured pencils or watercolours, this is the stage to introduce colour to your drawing. Layer colours gradually to achieve realistic hues and tones. Observe your reference closely to match the bird’s actual colours. If using traditional media, be mindful of the colour order – lighter colours before darker ones – to avoid smudging.
Tips for Success:
- Patience is Key: Take your time at each step and don’t rush through the process.
- Practice Makes Perfect: Don’t be discouraged if your first attempts aren’t perfect. Practice consistently to improve your skills.
- Experiment with Styles: Once you’ve mastered the basics, feel free to experiment with different styles, from realistic to more abstract interpretations.
- Embrace Mistakes: Mistakes are part of the learning process. Use them as opportunities to learn and refine your technique.
- Stay Curious: Keep studying real birds, both in the wild and through various references, to continually refine your understanding of avian anatomy and characteristics.
How to Draw Birds Focusing On Anatomical Details!
Describing the anatomy of a bird through text can be quite detailed and intricate, but I’ll provide a simplified overview of the key anatomical features. If you’re looking to draw a bird’s anatomy, it might also be helpful to reference images or diagrams to get a better visual understanding. Here’s a basic breakdown of key elements to consider when drawing birds.
Head
Beak: Varies in size, shape, and function depending on the species. Can be adapted for different types of feeding (e.g., long and slender for probing, stout and hooked for tearing).
Eyes: Usually located on the sides of the head for a wide field of view. Some birds have excellent color vision.
Crests and Wattles: Ornamental structures on some bird species’ heads for display purposes.
Torso
Neck: Connects the head to the body, allowing for movement and flexibility.
Chest: Contains the powerful flight muscles (pectoral muscles) that power a bird’s wings.
Wings: Adapted for flight, varying in shape and size across species. Comprised of bones, feathers, and muscles.
Tail: Helps with stability during flight and can vary in shape and length depending on the bird’s behavior (e.g., long for steering in birds of prey, short and rounded for maneuverability in smaller birds).
Legs and Feet
Legs: Attached to the body’s torso, adapted for different types of locomotion such as walking, hopping, running, or swimming.
Feet: Vary in shape and function based on the bird’s habits (e.g., webbed feet for swimming, talons for grasping prey).
Talons: Sharp, curved claws found on birds of prey used for catching and gripping prey.
Feathers:
Contour Feathers: Form the outer layer of a bird’s body, providing its shape and streamlining for flight.
Down Feathers: Soft and fluffy, located underneath contour feathers, providing insulation.
Flight Feathers: Large and sturdy feathers found on the wings and tail, essential for flight.
Internal Organs
Respiratory System: Birds have highly efficient lungs that allow for a continuous flow of air, providing a constant supply of oxygen during both inhalation and exhalation.
Digestive System: Birds have a unique digestive system that includes a crop, gizzard, and cloaca to help process their varied diets.
Skeleton
Lightweight Bones: Birds have hollow bones filled with air sacs, which reduce overall body weight, aiding in flight.
Keel: A prominent ridge on the breastbone to which flight muscles attach.
In conclusion
Birds are a global unifier! It is a subject that everyone can get stuck into. The subjects are limitless and the process of learning to draw these winged creatures begins the moment you lift your head to look out of the window!
They form a constant presence in my own sketchbooks and I love the process of slowing down to observe and then capture this subject.
I’d encourage you to join me in my Bird a Day Challenge for 20 days exploring the techniques needed to draw birds!
Drawing birds is a journey that combines observation, skill development, and creative expression. By following these seven steps and adding your personal touch, you’ll be able to capture the essence of these incredible creatures on paper. Remember, each bird you draw is a stepping stone toward honing your artistic abilities and developing your unique style.
So spread those artistic wings and get drawing.


