You may only be drawing for a short while before the concept of perspective looms large.
I found that I got quickly frustrated at not understanding and, therefore, not being able to convey a sense of depth, shape and context in my drawings. They always seemed to look, well, a little flat! I’m hopefully going to dispel any uneasiness when it comes to learning how to draw perspective.
Betty Edwards in the cult classic “Drawing on the Right Hand Side of the Brain” advocates that perspective is one of the five key components necessary in drawing. She also highlights the relatable following;
“You, too, will learn to “draw in perspective” a goal, I’m sorry to say, that has become the Waterloo of many art student and often carries a huge charge of dread that is quite unnecessary. Hearing the phrase “the science of perspective,” with its aura of lengthy, tedious, and boring lessons, can wilt the ambition of even a determined drawing student.”
I’m hoping any dread you may be feeling at mastering how to draw perspective will be dissipated somewhat by the end of this article.
Perspective can support you create new dimensions to your drawings, create more realism and build your story on a page. And, even if you only draw objects, perspective applies to all aspects of drawing from subject matter right through to how you choose to use colour to emphasise depth and shape.
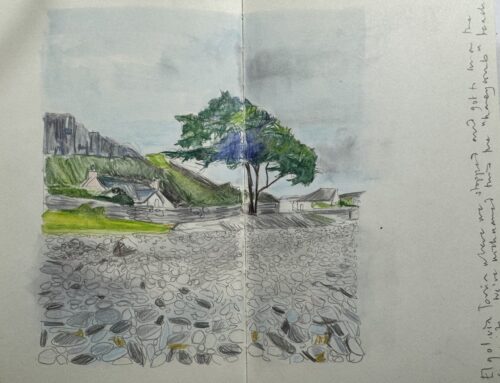
Learning perspective is all about the rule of “three”. I tend to use up to three types of linear perspective. These are simply known as one, two and three point perspective. In turn they are dominated by three types of line. The horizon, vanishing points and vanishing lines. If you can master an understanding of these you will master the universe on the pages of your sketchbook.
At first you may start needing to put invisible learning lines onto your page which you can rub out once you are happy with your drawing, but in time you will find your eye will take the lead and learn the language to use on the page. Literally and figuratively!
Interestingly, however, plenty of artists choose not to really engage with perspective. Gaining an understanding, however, of how to use it can support you build whichever type of sketching style you want to use.
Over the course of this post I am going to share how I have found myself using it in my sketchbook pages.
Let’s start with one point perspective and move through the different perspectives we can use to help us master how to draw perspective!
Table of Contents
One Point Perspective
Let’s start our perspective journey with one point perspective.
One point perspective is defined as;
“A drawing has one-point perspective when it contains only one vanishing point on the horizon line. This type of perspective is typically used for images of roads, railway tracks, hallways, or buildings viewed so that the front is directly facing the viewer. Any objects that are made up of lines either directly parallel with the viewer’s line of sight or directly perpendicular (the railroad ties/sleepers) can be represented with one-point perspective. These parallel lines converge at the vanishing point.” Wikipedia
One point perspective highlights how the further away you get, the smaller the object becomes, eventually meeting at a single “vanishing point” on a horizon line. This is the first type of perspective method that starts to suggest a three dimensional approach to your drawing.
This type of perspective is the foundation of my drawing practise and the one I use the most. There are a few additional things to mention about this type of perspective.
- Notice what you are looking at when you look at a picture head on. The objects or images facing me are true to their shape. Sides are parallel to the paper edge. You can essentially transcribe what you see in simple shapes and lines.
- Those objects and / or images will always be true to their shape because they sit on a horizon line. i.e the line on eye level.
- Identify the point to which your eye naturally moves. This is known as the “vanishing point,” located on the horizon line.
- All the objects or scenes that move away from this line all move towards this vanishing point.
I run through this visually in the video accompanying this blog post and talk you through how you can get started simply. It is worth you having a go practising picking out how you would identify one point perspective in a magazine, walk or photograph and then basically transcribing it onto paper. I also quickly show you how you can use this technique to sketch some day to day objects that you may never have thought to use in your own practise.
This is the first step in how to draw perspective.
Two Point Perspective
Now we move onto the next rung of the perspective ladder and one which bolts naturally onto the first.
Two point perspective is defined as;
“A drawing has two-point perspective when it contains two vanishing points on the horizon line. In an illustration, these vanishing points can be placed arbitrarily along the horizon. Two-point perspective can be used to draw the same objects as one-point perspective, rotated: looking at the corner of a house, or at two forked roads shrinking into the distance, for example. Wikipedia
Two point perspective starts to become a little more complicated than one point perspective and, to be honest, any definition for me always needs backing up with a visual which I have included below. The easiest way in which I configure this in my head is that there are two points on my horizon line.
Think of what you see when you look at a corner of an object. You will see two sets of parallel lines running to meet the vanishing points of which there are always two. (As illustrated in the demonstration video.)
My sketch of the Yorkshire Tea boxes are a perfect example of two point perspective.

The top points to remember with regards to how to draw this type of perspective are as follows;
- There are three steps to marking your page with two point perspective drawings. One and two are the vanishing points on the horizon line and three is the line or point that connects to the vanishing points.
- The lines always meet at the 2 vanishing points but will always keep moving parallel as they cross (this is closest to you!).
- No line ever meets as it recedes.
- You can build your picture with the use of lines which constantly cross.
Three Point Perspective
….And the final part of the blessed trinity of perspective is known as the three point perspective which is naturally the most complex of all. You may never realise that you are using this. It seems to be the case, however, that as you become more proficient in one and two point perspective, you quickly become familiar with how to draw perspective so that when you get to the more complex formations your brain is able to identify and translate onto a page.
You may see this type of perspective referenced as Cartesian (after the great man Descartes himself who implemented a mathematical measurement system). It just goes to show you that if it is referenced as such the angles and maths at play within this type of image are considerable.
In the meantime though here is a three point perspective definition and my attempt at explaining it to you in my video!
“Three-point perspective is often used for buildings seen from above (or below). In addition to the two vanishing points from before, one for each wall, there is now one for how the vertical lines of the walls recede. For an object seen from above, this third vanishing point is below the ground. For an object seen from below, as when the viewer looks up at a tall building, the third vanishing point is high in space.” Wikipedia
I would like to be more verbose on this subject but think trying to explain this in writing is more complicated than showing you.
The top points to remember with regards to how to draw this type of perspective are as follows;
- There are 3 vanishing points. You have already been able to plot 2 vanishing points on a horizon line from your two point perspective. Now you get to plot a third either below or above the horizon line.
- Always fit your drawing within a triangle.
I’m hoping that this very brief explanation of three basic types of perspective will give you enough of an idea to get started having a go with some simple objects and settings yourself. I’m equally hoping that Betty Edwards’ description that perspective is an art’s students “Waterloo” and fills them with a “charge of dread” has been avoided in this case also!
Flip through your existing drawings or magazines. Stop and ask yourself which type of perspective you are looking at. Have a go getting it down on paper yourself. Use the lines to help guide you as you draw. You can always rub them out later.
Very soon you will find yourself automatically programmed to translate the 3D image in front of you onto paper!
As always get in touch with me to let me know how you are getting on.
I’m hoping if you’ve read this far you might consider joining Emily’s Notebook community and getting top tips and advice!
Don’t forget that you can try all of this out with me inside my learning membership. Join me for the 10 day perspective challenge as we take on the subject of buildings! You can join me here!