Drawing in proportion is akin to achieving a gold medal in the art world.
Why is drawing in proportion so important to us as artists? We are driven to imitate the real world in the pages of our sketchbooks and on paper. Drawing in proportion becomes somehow essential to creating accurate imagery and allows us to create well balanced and realistic interpretations of the world in which we move.
There is no getting away from it but drawing in proportion may require some mathematical jiggery pokery as you first set out on its journey. Proportion was a frustrating concept to get my head around when I started to draw. It was the make or break of my sketchbook page. It had the power to throw out everything else on my page, as well as turn a basic drawing into something that looked marginally realistic.
But how truly satisfying to have mastered the technique!
I would like to hasten to add, however, that proportion is not the be all and end all of drawing. Plenty of artists abandon drawing proportionately as part of their creative style. You may find that this is the case too. For the most part, however, this urge to challenge our brains to convey an image as realistically as possible means that drawing in proportion is an essential drawing skill to have up one’s sleeve.
The eye and the hand can be trained to perform quick feats of proportionate drawing at the drop of a hat!
There is plenty to say about this subject but I’ve pulled together 4 top tips that I personally employ when approaching the subject.
Before I jump to it though there is a reason why I am drawing your attention to the Leonardo sketches accompanying this post.
Take this as a pre-tip lesson to this article.
Studying the greats is a great starting reference point.
Leonardo’s studies are exquisite in their sketchbook accuracy. He followed a long tradition of classical antiquity where famous sculptors made accurate studies of the human form. All artists of the 15th Century followed this oeuvre of study. Leonardo, however, took things one step further by breaking down the body as fractions of a whole or in parts. His emphasis fell on the proportions of one individual part of the body to the other!
He sought to impose some sort of mathematical geometry whilst drawing in proportion BUT what was also doubly fascinating was that he was known to draw the entire subject (e.g the head) before trying to apply a geometry to it. This approach connects up with the idea that when we start to draw we apply the contour rules first. (Check out my thoughts on contour drawing here.)
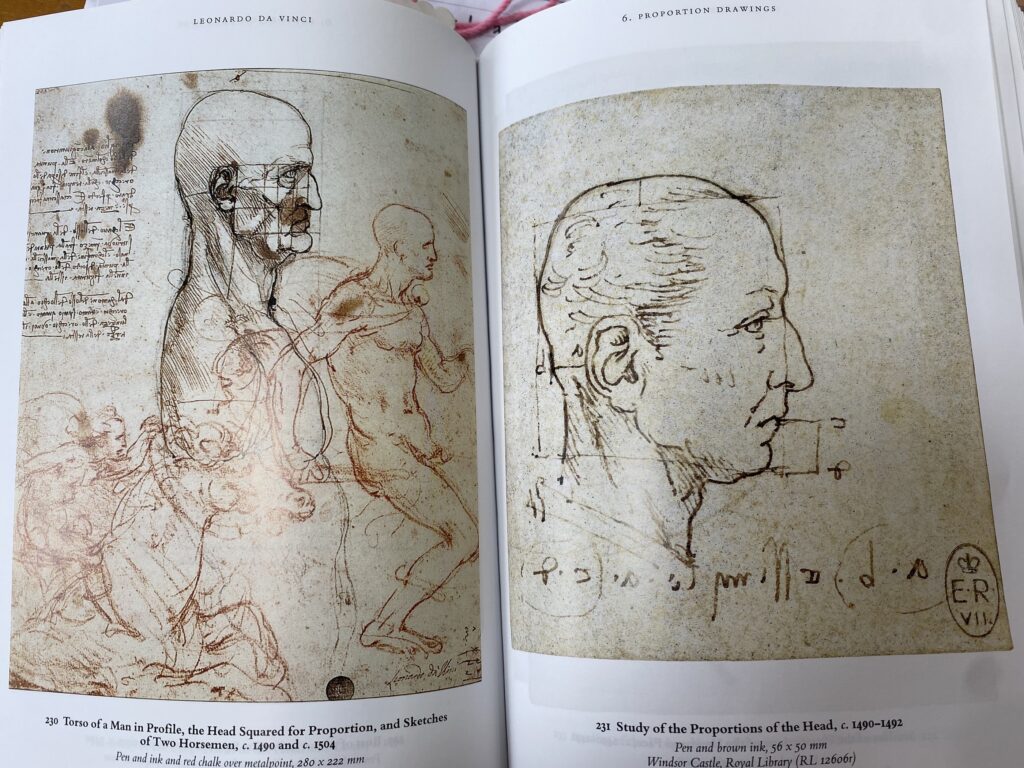
Table of Contents
Drawing in Proportion. By Eye. Sighting.
The holy grail is to be able to lay down an image straight away or better still start your pencil on one part of the paper and if by magic scope out an entire drawing. In order to learn to train the eye, however, a range of tools may be needed to help you do so. I love to teach to learn to draw by training the eye! We are constantly judging what we see and estimating lengths, weights, distances and measurements in general. Think about the occasions you do so in everyday life.
(I envy the cooks that are able to make a perfect unlumpy sauce or cake for example without using weighing scales and doing so by eye!)
The first top tip is a simple one that you can accomplish using your pencil.
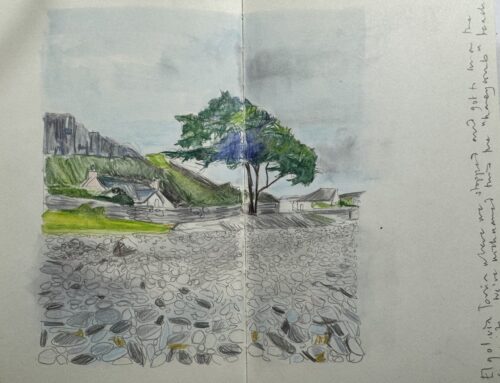
Take a look at my sketch of my best friend making the best roast potatoes. So good are they that they merited a drawing of her making them. (This, by the way is what I love about being able to draw quickly in my sketchbook and in the moment!)

I used a technique called sighting here with my pencil. This is the mathematical element (well…as mathematical as it gets for me.) Notice the dotted lines I have sketched to the sides of these two sketches. My pencil is my aid for the proportions.
To “sight” simply hold your pencil in front of you and use it as you would a ruler. Again, as I always advocate, you need to really look at the shapes and spaces as well as how your pencil lines up against them in a bid to then translate this onto your paper.
There are three different strategies to support you “sight”.
Finding the middle. Wherever possible ask yourself whether you can split your drawing into a generic half. The figure standing is a perfect example of this. I can immediately use the “midpoint” at the hip to support me build my drawing. Use your pencil. This, I think is one of the most important lessons of proportion because it supports you place your drawing! It prevents it falling off the page!
The plumb line. This can be used for vertical and horizontal drawing.
By comparison. Linking back to how Leonardo measured out his drawings. Use one aspect of the picture to support you find the proportion and then using your pencil as your ruling guide break down the shapes in proportion to one another.
Use the Clues in the Drawing!
I want to show you how I not only use a 3 step process for the image as a whole but also for setting it into the environment or context it is in. One of the benefits of finding the middle of your image with your pencil as cited above is that it helps to anchor your drawing.
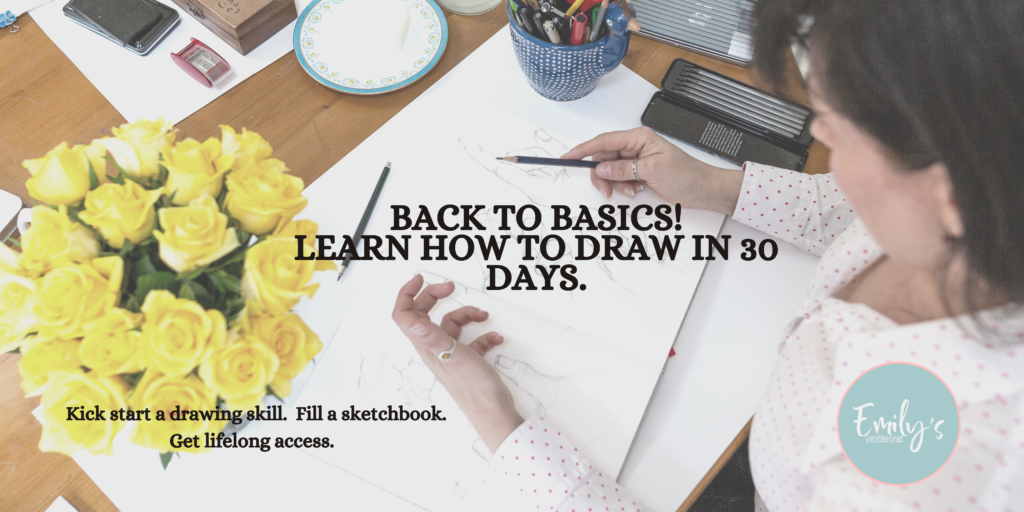
In lesson 2 of the Back to Basics, Learn to Draw in 30 Days course, we talk about how to anchor your image within the shapes and spaces it sits within. How do you draw the entirety of anything in proportion when you don’t have the whole?
It can help to find a starting shape in your image from which to draw. Remember how I have cited that roughly sketching out your contour is the first step? And rough it can be! You can then use your pencil to support you “map” out the proportions of your image in relation to the anchor shape. You can use a modified contour sketch at this point which does not commit you to a final line but supports you scope out the basic parameters. (You can read about contours here!)
With practice you then refine and adapt whilst constantly gauging the image in front of you! It always helps to get something down on the paper and then work on refining it down further. Another great reason that sketching quickly is so beneficial to this process.
Employ Negative Spaces to Support You!
I have come to love negative space drawing. For those of you needing a quick reminder of what this is you can read about it here!
Whenever I get stuck with a drawing I now immediately turn to a range of tools to get me “unstuck.” Negative space is one of them. I have written so much on this subject and focus on teaching it as part of my Back to Basics. Learn to Draw in 30 Days course as a great basic technique to make your drawing more robust!
Forget for a moment that you are beleaguered by this thing called proportion. Following on from finding the spaces and shapes as clues in your drawing, now move to spotting the negative shapes. Draw the negative shapes that you see! By default you will then start to see proportionate lines emerging around the shapes you have been drawing and still reach the ultimate aim of drawing in proportion.
Sometimes ask yourself this question. What is the best way in which I can perceive this object? Forget your definition of what you are drawing. See it as a collection of spaces and shapes.
See the Whole As Well As Perspective!
Have you created a frame around the image you are looking to draw? Before you start your drawing, create a border around your page so that you can ensure you adopt all the tips mentioned above.
In learning to take a look at the whole first it does a few things.
It takes the pressure off the image you are trying to draw by placing it within your frame, it ensures you are going to be able to fit it into the page, it forces you to assess the other “clues” within the drawing, and it also enables you to place a few more guiding principles in place.
One such overarching principle is perspective, or in the case of human beings foreshortening. Perspective, whether 1,2 or 3, (read about perspective here) can be employed whatever you are looking at drawing in proportion, whether landscapes or townscapes. What impact can perspective have? It can support you build further geometric guidelines within your image. Drawing in proportion forces us to get accurate on paper. Measuring is critical in order to convey an accurate image.
Try and draw an avenue of trees at your local park to prove how to use one point perspective and receding trees!
Conclusion
I wish there was a simple way of conveying proportion. You will find that drawing in proportion becomes easier the more you practice simple drawing techniques as part of a step by step process. Compiling your own toolkit by which you learn to place images in relation to one another as well as the whole will become essential. Drawing in proportion CANNOT stand alone. It requires a variety of different techniques that with time become second nature. All of these techniques are based on how we choose to “see” what is in front of us!
Interested in coming on a journey where this step by step process is broken down fully? I hope so! Check out the Back to Basics. Learn to Draw in 30 Days Course with me!