There are five basic drawing techniques that should form part of your sketching toolkit.
With time and practise you will hardly realise that you employ them in the sketching of basic subjects. Knowing what they are, however, so that you can adapt, adjust and learn where you may be going wrong is an important part of becoming better at your craft.
Table of Contents
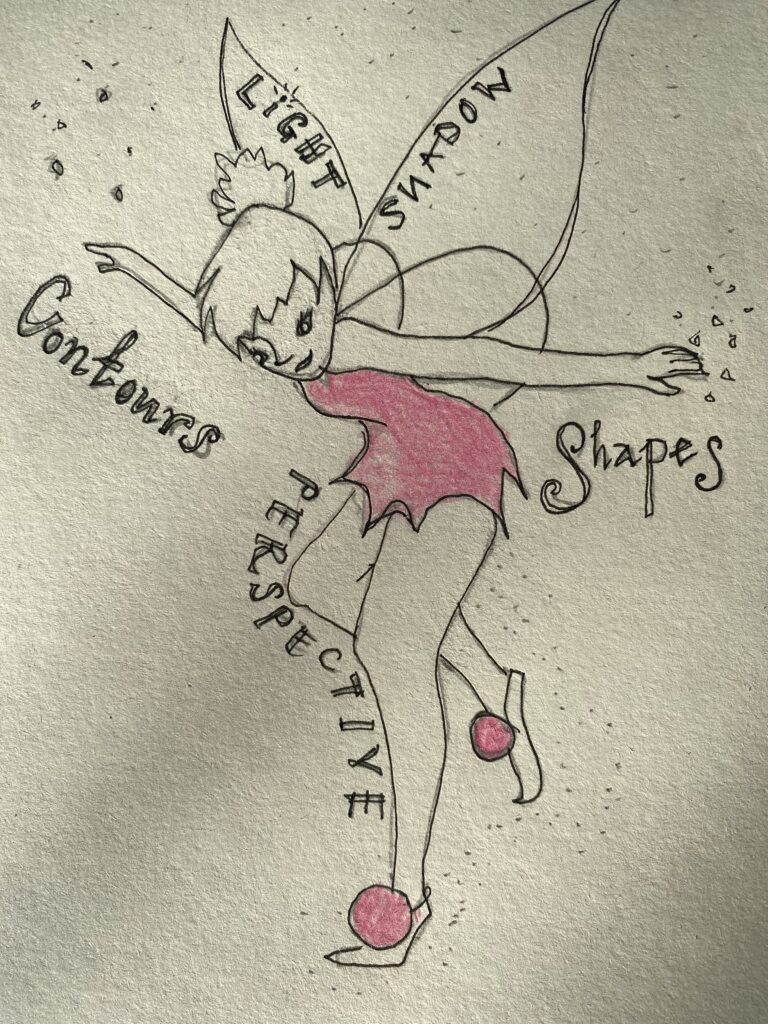
The 5 Key Basic Drawing Techniques Are As Follows;
- How you draw the contour line on your page.
- Shapes. The positive and negative spaces on your page.
- Proportion and perspective.
- Tone and Shade.
- The “tinker bell” fairy dust. The coming together of your drawing. The emergence of your creative style.
(Forgive the Tinkerbell analogy and feel free to substitute her for an alternative spirit for which she is intended! In developing an approach to take in the first 4 techniques, and practising them, you will naturally evolve into point 5.)

Understanding these basic principles may support you understand where you are going wrong. You may feel as if you are practising and practising but getting nowhere. This, unfortunately, and in most cases, leads to a defeatist attitude and a belief that, surely, you are “no good” at this and don’t have creative potential.
When I picked up sketching, I very quickly became interested in, not only the psychology of drawing, but in the technical practise of my craft.
Some argue that following too technical a drawing approach can stifle personal style and being creative.
I’m not sure I agree with this as it implies that the two are mutually exclusive. I believe that in understanding a little theory, you can go a long way in training the brain, hand and eye to become a more confident artist. Once confident you can then develop your creative style and potential.
Once you understand what 4 of these are and how to use them you will find the 5th evolving naturally.
Contours.
(Not outlines!)
The first of the famous five basic drawing techniques, focuses on putting pencil to paper and converting what you see onto the page. Making your mark.
What should those first few lines look like?
The analogy I think of here is that of a skeleton. The contour lines you make underpin the drawing and form a foundation to all the other elements. There is a difference too between contours and outlines. An outline is the overarching shape, the contour lines of an object force you to look at the very essence of the shape in front of you.
If you are at the very start of your drawing journey I believe that there is a pre step to this phase. The act of mark making. You can read all about this in an earlier blog post here. The first marks you make on your page should be done confidently. The art of practising line drawing, squiggling or doodling will support you develop your contour technique. Learning to feel the pencil strike the page, the pressure with which you make different marks, the marks you make using different materials, paper and so forth, how your hands feel and what they do will ALL come in handy when you get to actual drawing. In time they become second nature. I would even argue that the way in which you make your mark defines your creative style.
When you come to the actual drawing of a contour line, although it is your fingers holding the pencil that you use, it is your eyes that will be doing most of the work.
How your eyes, hands and brain communicate become refined over a period of time as you become more competent.
Kimon Nicolaides, in his 70’s cult classic, The Natural Way to Draw – A Working Plan for Art Study, dedicates the first chapter of his book to contour and gesture. His opening statement heralds the first step everyone looking to draw should take,
“Correct Observation. The first function of an art student is to observe, to study nature. The artist’s job in the beginning is not unlike the job of a writer. He must first reach out for raw material. He must spend much time making contact with natural objects.”
He goes on to stress how we should seek to do this,
“Learning to draw is really a matter of learning to see – to see correctly – and that means a good deal more than merely looking with the eye. The sort of “seeing” I mean is an observation that utilises as many of the five senses as can reach through the eye at one time.”
At this point, if you are new to drawing I would encourage you to start drawing the things you love and know well. When I started to draw, I started with what I love. I relate entirely to Nicolaides’ additional point,
“A man can usually draw the thing he knows best whether he is an artist or not. A golfer can draw a golf club, a yachtsman can make an intelligible drawing of a sail. This is a thing with which he has had real experience, a thing he has touched and used. Many other things which he has not seen as often, but not used, he would not even attempt to draw.”
I have some suggestions for techniques to try;
- So after you are satisfied with your mark making techniques of the pre exercise, look around you and select a variety of objects that you love.
- Focus on the object, and without taking your eyes off it, run your eyes along the edges of the object drawing as you go. Imagine the pencil is touching the edge of the object you are drawing. Draw any lines you come across. You can apply the same technique to drawing landscapes, your face, and any object you so wish.
- If your eyes stray back to your paper, place your paper, and drawing hands beneath a cardboard box and continue to complete your sketch in this way.
The scribbly, and no doubt indecipherable spidery lines are not the outcome. Its the process your brain is going through that matters!
Shapes.
How do you create a three dimensional world in two dimensional splendour on a flat piece of paper?
What is difficult for our brains to comprehend is that every part of the page we draw on has a function as part of that drawing.
If you are drawing a cup for example, in reality it is surrounded by air. On paper air translates into a tangible shape – albeit ill shaped and undefined. This is commonly known as negative space. You may have seen me refer to this example best in my blog post on negative space and why I think it is positive, which goes on to explore the benefits of acknowledging negative space drawing as part of your practise.
There are two ways to sketch a drawing. Using the positive viewpoint or in the negative. The fascinating challenge our brains go through is using our trained visual understanding of what objects are supposed to look like rather than what we see in front of us in the moment.
Learning to appreciate negative space is extremely important when building our drawing toolkit. Betty Edwards in her book Drawing on the Right hand Side of the Brain likens the positive and negative spaces as “pieces of a puzzle” that come together in a drawing. Often they fit together simply, the negative spaces especially being simpler edged shapes that when drawn correctly give our drawings backbone and structure.
Proportion and Perspective.
This is perhaps my favourite basic drawing technique. There is nothing basic about it whatsoever!
Without this one I felt my drawing always floundered and I became frustrated. Drawing in perspective is often founded on exploring paradox and forcing our brains to think in puzzling opposites.
There are three different types of perspective to understand on a very basic level so that you know which one you need to employ to support you draw. You can find these detailed in my blog post exploring 1,2,3 point perspectives with the relevant illustrations.
Let’s move onto the other challenging drawing area of proportion. When you draw it is also important that your drawing is believable. Drawing things in proportion is often the way in which this is achieved. The proportion of facial features, or the arrangement of furniture in a room will also succumb to perspective challenges on some level, and whether they are close up or far away.
Tones and Shade.
I’m a fan of this particular basic drawing technique.
Light creates tone and shade on the objects you choose to draw. I always find myself thinking about that tin of different types of H and B pencils you can buy for purposes of shading, each one lighter or darker than the next, designed to create a shaded drawing between light and dark.
You can define how light falls on an object into four different categories which you can assess against my sketch of a nectarine;
- The brightest area of the object. The point at which the light falls most directly on the object.
- The darkest area. Where the light is blocked.
- Reflected areas. Where the light falls on areas away from the object but is reflected back onto the object itself.
- Condensed shadow, commonly used to emphasise rounded forms.
This is a great first exercise to try as all you need is a pencil and piece of paper. Draw your object, shine a light on it and have a go translating how you see the shade and tones using different pressure points of your pencil. (This is where your mark making practise comes in!) Follow the four steps above.
And Last but by very no means least!
Your Artistic Voice aka Tinkerbell
Earlier last year I read a brilliant book by Lisa Congdon called “Find Your Artistic Voice.” This was a comforting creative read exploring and emphasising practical steps in the pursuit of discovering your creative voice.
It left me thinking deeply about our attitudes towards creativity and how we are all too ready to stop, give up, and resign ourselves to the belief that we aren’t very good. And this is all before we have actually put into place an approach to give ourselves a chance to succeed. Do we research techniques, like the ones above, enough? Do we give ourselves the best chance possible to explore our mistakes in order to do it better next time? I’m not sure we do. I think the majority of us abandon the pursuit of a creative style because we may actually have to work for it (albeit pleasurably) and to some extent commit to the process and not just the outcome of a sketch or picture. In addition, and not to labour the point too much, we pursue being creative in our down time as opposed as a structured step by step, goals based activity. The two, though can co-exist.
The glue that makes your drawing come to life is your unique approach to using all the above methods combined. As you practise more and more the neural pathways in your brain will circumnavigate and speed up the process of drawing. We are always searching for what our style looks like on paper, but the fundamental principles outlined above remain.
No one else will be able to produce a drawing quite the way you can!
All of these basic drawing techniques when combined enable you to forge ahead in confidence when you come to draw. In response to many of my community requesting insights into each of these areas I have developed a Scratch to Sketchbook in 10 Weeks Course. The course’s main ambition is to support you grow in confidence, give you an understanding of how to use techniques and then support you develop your own style through the development of monthly sketchbooks! Over the course of 10 weeks you will be practicing all of the above techniques in a combination of live tutorials and guiding lessons for you to keep.
Check out my free live video tutorial on the Basic Drawing Techniques with further insights into some pre work and mindset challenges you can try!
Join Emily’s Notebook Community to access weekly newsletters, events and updates.


