I get asked ALOT about how to draw trees.
They are at once the most simple and complex drawing subjects.
In his book ‘Drawing and Painting Trees’ Adrian Hill empathises with the reader,
“….there is nothing so ruthless as the painting of trees in compelling you to realise your technical shortcomings. If you are weak in drawing, that weakness shows up immediately…the approach to competence in tree painting must be by way of drawing, composition, and tone, plus colour, plus technique. These are all essential, and should be mastered in the order named.”
Anything linked to learning to draw can be mastered by following a technique rooted in the basic drawing principles.
Another influential artist of his time, Van Gogh, created memorable paintings of rural and urban trees. He taught himself to draw. Some of his very first drawings depict the rural country lanes of his home in North Brabant, the distinctive features of his homeland such as this sketch, The Road to Etten 1881.
I particularly love exploring his early sketches that underpin his phenomenal development as an artist later on. (Encouragement to us all that we too must start somewhere!)
Let’s start to de-mystify how to draw trees!
There are a range of steps I would recommend when drawing trees.
The first revolves around your observation skills.
How well do you appreciate not just the tree itself but the environment in which it stands? You need to start with an appreciation of the whole!
The whole tree. The whole environment or context. The whole page of paper you are working on.
The ideal aim is for you to create a methodology that you can use time and time again to achieve similar results linked to your style. Van Gogh practiced daily for 2 years – relentlessly to master the drawing craft. He developed a style and process – as can you but you need to have an understanding of the basic drawing principles. (If you’ve not yet had a chance to check out what these are take a read over here.)
As you get started on how to draw trees, ask yourself the following;
- What is the generic shape of the tree. If I had to draw it as one shape how would I do it?
- Where is the horizon line on which the tree sits?
- Are there any other surrounding subjects that will help refine and define your tree in its environment.
- Are you happy with your viewpoint of your tree?
As I write this article I am about to launch my 10 day tree drawing challenge. It is January in the UK. Drawing winter trees is the best way to start to learn to draw trees. I reference them as skeletons, an ideal opportunity to refine shape and work on intricate details such as expose branches, rounded out tree trunks, and spindly end branches.
Basic shapes and outlines are visible and this lends itself to fundamental construction which enhances a good drawing. Knowledge of a tree’s anatomy should proceed a fully clothed leafy tree, very like knowledge of human anatomy proceeding a drawing of a fully clothed figure.
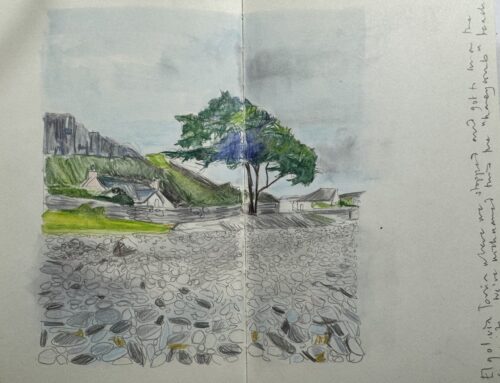
I came to this conclusion after I spent a year photographing my favourite tree (in the accompanying picture!) in all seasons. This tree provided a wonderful reference point for my study of trees in my sketchbooks.
So let’s get started.
I have used a sketch of a tree I walk by regularly in the Peak District.
Table of Contents
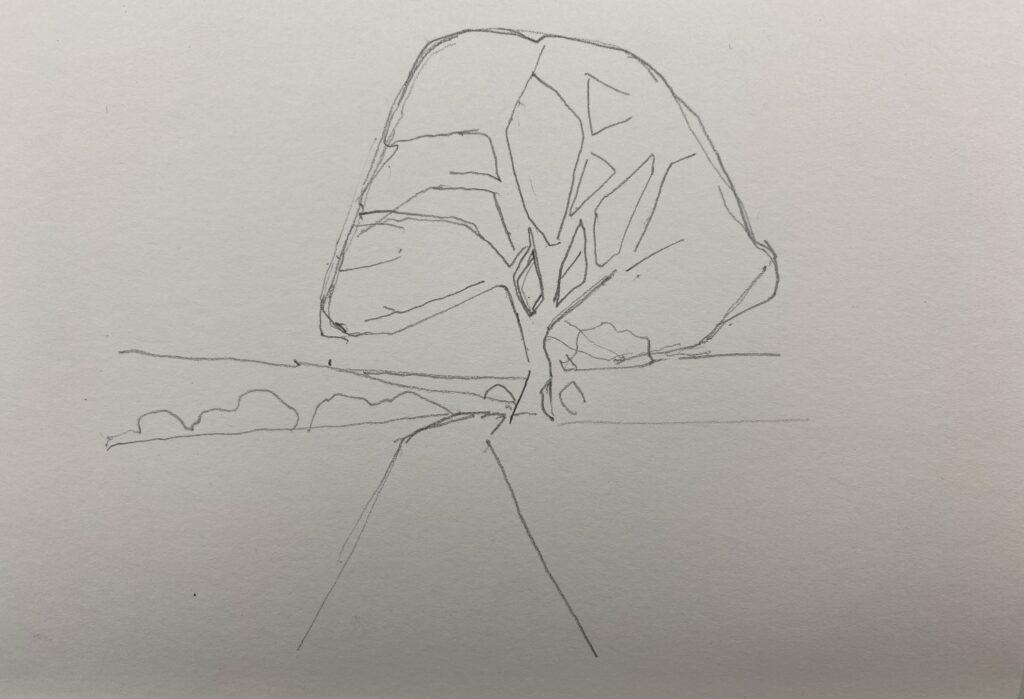
Step 1. Create the Contour Shape.
As you start your drawing you want to ensure that you approach your drawing from the whole viewpoint.
I want you to focus on two things.
The entire generic shape of the tree itself.
The horizon line.
The horizon line will support you work out where to anchor your tree. Make sure you also check on the proportion of your tree shape in relation to the horizon line. Mark out the height of the tree from the point at which you anchor it on your horizon line.
Now roughly sketch out the shape of the entire tree making sure you also include the shape of the tree trunk.
You are making sure that your tree fits on your page PLUS you are building the tree into its surroundings straight away. Don’t worry too much about whether or not the shape looks right. The object of this first step is to ensure your tree “fits” as you want it to on your page.
You are employing the first valuable drawing principle known as the contour!
The contour will follow you through the process of drawing your tree.
Step 2. Creating Shapes!
Your next task is to spot the major tree trunks and what I call “markers” in your drawing.
It’s important to break up the complexity of the tree, either into segments that you can work on step by step at a time, or into shapes and spaces.
This is the step that I always think looks odd to the eye as you are working on it.
I try and forget that I am working on drawing a tree at this point and purely approach it as a series of lines, shapes and spaces. Remember what I advocate and teach about de-constructing an object or thing? Forget what you know about it and simply use your observation skills to guide you, not our understanding!
I use negative spaces to help me map out the tree “contents.” I spot where I can see interesting shapes across the entire shape and build them in. This segments my tree. It looks rather like a flat mosaic at this point too.
I would argue that this is the most important step when it comes to mastering how to draw trees!
Firstly, it prevents us getting confused by millions of tiny little branches. Your eyes can become easily bamboozled. Secondly, we can choose how detailed we want to go. You don’t actually need much to draw a competent tree and this simplicity lends well to anyone sketching LIVE or in the outdoors or limited on time.
Step 3. Branching Out.
Now that I have my spaces outlined I can zoom in on some of the details.
Remember that trees follow a certain logic whereby the tree trunk is the thickest part of the tree and then you have a gradual thinning of the branches. This is the point at which you start to mark out where the thickest parts of the tree rest.
I also start to mark out the finer areas inside the tree shape itself. This includes the clumps of finite new branches at the tip of the tree. Its worth spending some time observing what this looks like.
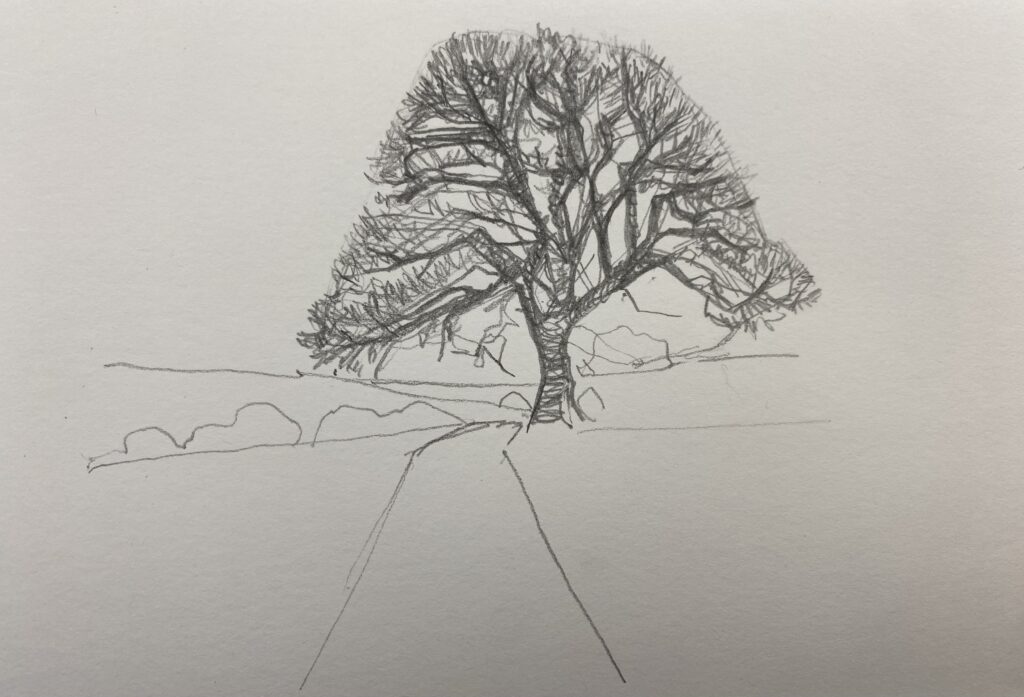
Step 4. Mark Making!
Now we can have some fun with the detail.
We’ve gone from thicker to thinner! Its time to start to think about how we refine our pencil working.
I’ve started to build out the detail by using my pencil to create the cylindrical tree trunk , extending this mark making process all the way up the main parts of the tree trunk. Again, this can be a vertical line for a straight tree or a slightly curved line for a more natural look. Consider the thickness of the trunk depending on the type of tree you want to depict.
Add branches to the trunk. These can be smaller lines extending from the main trunk, branching out in various directions. Remember that branches don’t all start at the same height, and they taper as they get farther from the trunk.
Experiment by ensuring you are using a different pressures of pencil marking to capture your tree shapes.
Notice that my original contour line is supporting me ensure I stay within the boundaries of my tree shape.
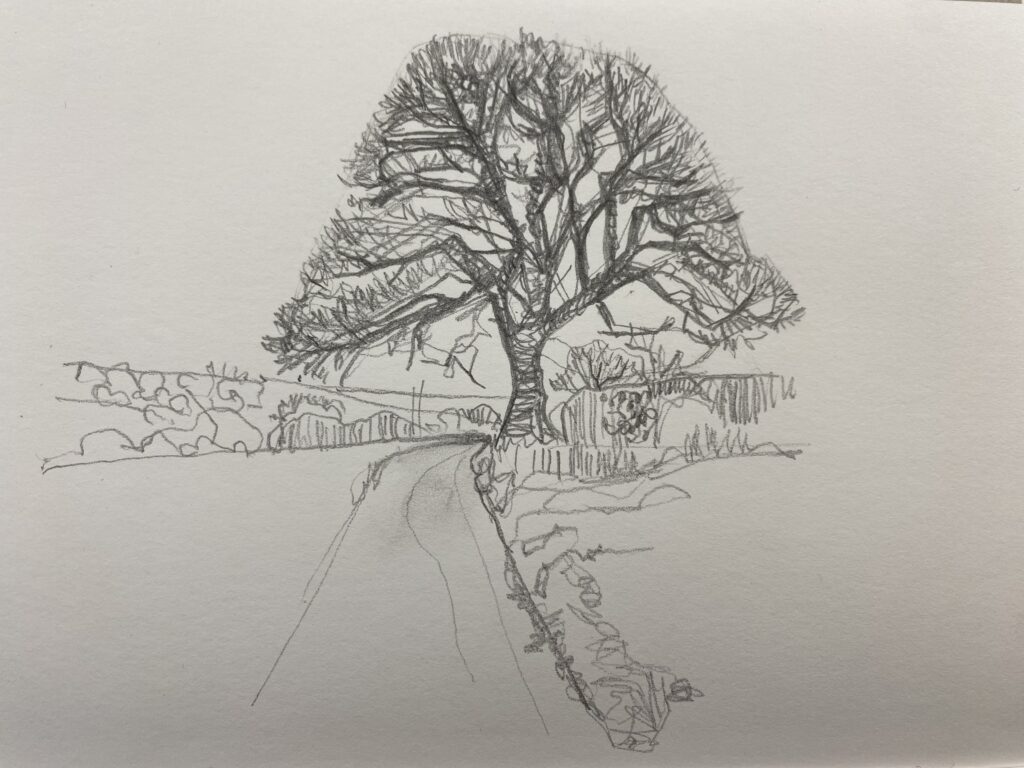
Step 5. Add Details
Now that you’ve captured the “essence” of your tree, add details such as texture to the trunk and branches. You can draw rough lines or small knots to represent the natural texture of the tree.
Also, if you are adding a canopy or foliage make sure to consider adding details to the leaves or needles, depending on the type of tree. For example, oak leaves have a distinct shape compared to the needle-like leaves of a pine tree.
I also love to add the surrounding details to the sketch too. Are there other trees in the drawing. Mine are at a distance so their shapes are different. If your tree is further away from you ensure that you draw relatively concise perspective markings of close up grass or other foliage to give the impression of distance.
Remember, practice is key to improving your drawing skills. Feel free to experiment with different shapes, sizes, and details to create unique and interesting trees.
So remember that to master how to draw trees you can follow this simple 5 step process! Don’t forget to crack open a sketchbook and make a point of practicing your drawing technique and style.
If drawing trees might be your thing I’d love to encourage you to come learn how to draw trees with me in my 10 day How to Draw Trees Challenge.
You’ll receive access to 20 minute drawing sessions, access to supplementary resources as well as teaching materials that are designed to support you master your understanding of how to draw trees.
…And if you’ve not yet subscribed to Emily’s Notebook to ensure you receive weekly reminders of resources, events and courses all linked to helping you learn to draw then I’d love to invite you to join the community! You can sign up here!
To your drawing success!


